
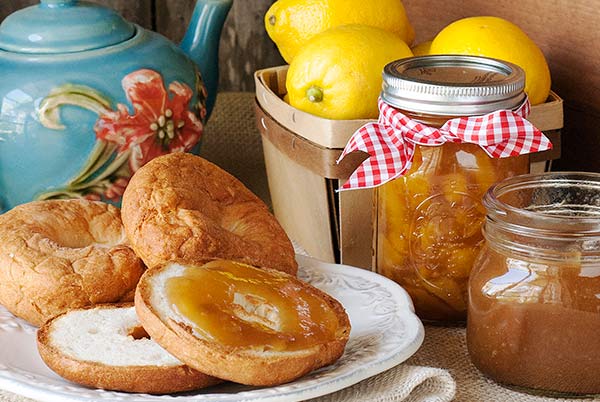
The Joy of Canning for Beginners
When summer finally arrives and the fresh produce starts rolling into the farmers’ markets where I live in Seattle, I can’t  wait to get out my canning books and start planning my preserving projects for the summer. Of course, as the editor of the Canning Across America website, I have to keep up on canning recipes and canning methods. But to be honest, I would do it anyway because I love the process of preserving food. It is deeply satisfying to keep my family and friends well stocked in canned goods that take advantage of the prime growing season and that we are then able to eat all year long.
Canning is the process of making previously fresh food shelf stable at room temperature by using heat, acid, and sterilized jars to create an environment that is unfriendly to spoilage via enzyme activity, mold, yeasts, and bacteria. Canning interrupts the natural decaying process present in food, destroys the potentially harmful microorganisms that may be present, and removes air from the jars to create a vacuum seal, which prevents other microorganisms from entering the jars and contaminating the food. The good news is that canning is very safe if you follow the directions of a trusted recipe.
The basic process of canning is actually quite simple: ladle hot food into sterile jars, add acid (like vinegar or lemon) if necessary as instructed by the recipe, screw on two-piece lids that are specially designed for home canning use, and then immerse the jars in hot water and boil or pressure can for a designated amount of time to ensure that the jars seal and that the microorganisms are killed.
 Processing canned jars at home can be done through water bath canning (boiling water) or pressure canning. High-acid foods like most fruits and acidified vegetables like pickles and chutneys can be water bath canned because the acid is high enough to kill off the bacteria that contains botulism which thrives in low acid environments. Water bath canning brings the jars and their contents up to 212ºF, which kills off yeasts, molds, and some bacteria. Pressure canning brings up the processing temperature to 24oºF, which is the temperature at which certain bacteria are killed in low acid ingredients like most vegetables, meats, and beans. Please note that you should never can dairy (such as butter), pasta, rice, or anything for which you haven’t used a tested and safe canning recipe. Recipes from your regular cookbooks should not be canned—especially if you are a new or inexperienced canner.
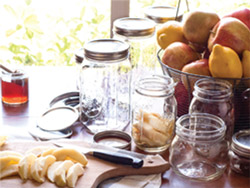
Basic equipment needed for water bath canning:
1. Canning kettle or large stock pot with a lid that is big enough to hold several jars without them touching each other and enough water to cover the jars by at least an inch
2. Canning rack that fits into the canning kettle and holds the jars in place during processing
3. Jar lifting tongs
4. Canning funnel
5. Bubble-removing wand
6. Canning jars with two-part lids
(Note: Check the jars for cracks or nicks, especially around the rims. Do not use jars that have even the tiniest nick. Canning jars with two-part lids are the only jars and lids approved by the USDA for use in home canning. The pretty bail and wire jars you see in kitchen stores should never be used for canning. The European jars with rubber gaskets are not approved for home canning by the USDA and should only be used by experienced canners.)
7. Kitchen towels for wiping jar rims and for setting jars on after processing
Basic Canning Procedures:
Please note that none of these steps can be eliminated. Remember that canning is the preparation of food for safe room temperature storage – it’s not cooking.
1. Choose a water bath canning recipe (don’t try pressure canning as a newbie) from a trusted site or book. Carefully read the canning recipe all the way through so you know the steps involved. Do not change or add anything.
2. Bring canning water to a boil in the canning kettle. Cover and keep hot while you make your other preparations. I usually bring the water and the jars in my canning kettle to a boil while I’m doing everything else for the recipe.
3. Wash the jars in soapy water and bring them up to a hot temperature either by placing in the canning kettle full of boiling water or in the dishwasher. Jars must be hot when you use them. You will be putting hot food into hot jars.
4. Wash the rings and lids in warm, soapy water.
5. Prepare the lids: Bring a small saucepan of water to a very low simmer. Add lids and simmer while you’re making your other preparations. Keep lids in the hot water until ready to use. This will allow the sealing compound on the lids to activate and become ready for canning. Do not boil the lids. If you boil the lids, you risk deactivating the sealing compound.
6. Wash your food ingredients and cut off any parts that have already started to go bad. You don’t want to put already decayed food into your canning jars. Prepare as directed in the recipe.
7. Follow the canning recipe exactly. Do not improvise, particularly while you’re learning. Canning is a science, not an art, with food safety as the top priority.
8. When it is time to put the hot food into the hot jars, carefully remove the jars from the boiling water with the jar tongs, pour out the water from the jars, and place the jars on the kitchen towel set on your counter. The towel will protect the jars against heat shock. Hot jars meeting a cold counter can cause the jars to crack or break.
9. Using a canning funnel and a ladle, carefully ladle the food into the jar, making sure to leave the amount of headroom specified in the recipe. The headroom will allow the air to escape the jar during processing without the food escaping as well.
10. Carefully wipe the rims of the jars with another towel to remove any food (which can interfere with the seal), place the lid on each jar, and screw on the ring until you just feel resistance. The ring is only there to keep the lid on during processing, so you do not want to screw it down too tightly, which may cause the lid to seal improperly.
11. Using the jar lifters, carefully place the jars back into the canning kettle. Make sure the water covers the jars by at least 1 inch. If needed, add more hot water to the kettle. Put lid on kettle and bring back up to boiling. Never try canning without a lid on your kettle.
12. Start your timer when the water starts to boil again. The processing time listed for the jars to be in the kettle is for boiling time.
13. When the timer goes off, carefully remove the jars from the kettle and place back on the kitchen towel. You will need to let them sit, unmoved, for 24 hours in order for the jars to seal fully and for the contents to cool.
14. Listen for the characteristic “ping!” of the lids as they seal. The sound is more of a “thwack” because the lids are being sucked in as they seal. This can happen in the kettle during processing, fresh out of the kettle, or a few hours later. Once the lid is sealed properly, it is safe for room temperature storage.
15. After 12-24 hours, check to make sure that your lids have sealed. A properly sealed lid will be sucked in a bit at the middle and will stay still when you press it with your finger. A non-sealed lid will be slightly humped in the middle and will move up and down if you press on it. Another way to check for a proper seal is to pick up the jar by the lid (after the 24 hour cooling period). A properly sealed lid will be strong enough to carry the weight of the jar and its contents. An improperly sealed jar needs to be stored in the refrigerator and used as you would use fresh ingredients.
16. For storage, remove the rings (keep rings in separate storage for use when you open or give away the jars), wipe off any food that has gotten on the outside of the jars, mark the contents and date (month and year) on the lid with a permanent pen, and store in a cool, dark place for up to 1 year. Do not store in a sunny window or in a hot location, as this will cause the contents of the jars to degrade very quickly.
Recommended Resources
• The most current edition of The Ball Blue Book Guide to Preserving
• National Center for Home Food Preservation: http://nchfp.uga.edu/
• Canning Across America: www.canningacrossamerica.com
Written by Jeanne Sauvage
Pingback: Gluten Free Strawberry Jam Recipe | Simply Gluten Free
Pingback: Quick Pickled Dilled Green Beans | Recipe | Simply Gluten Free