
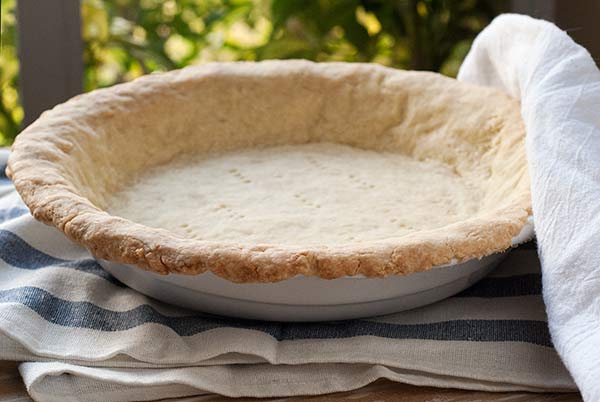
Gluten Free Perfect Pie Crust Recipe
Updated Oct 21, 2025, Published Nov 08, 2013
This post contains affiliate links. Please see our disclosure policy.
Bakers, start your ovens! Fall is what I consider to be the beginning of pie season. The temperatures start to drop, crisp apples and pears fill the produce shelves and a freshly baked pie seems to be the perfect way to cozy-up a chilly evening. And before you know it we launch into Thanksgiving and the beginning of Holiday Season. I ask you – what is Thanksgiving without pumpkin pie?
For many years after converting to a gluten free diet I made crust-less pies and was perfectly happy. After all a crust-less pie you can safely eat is better than a pie with crust you can’t! But as time went by, I started to resent my crust-less life and started using nuts and gluten-free cookies as a base for my pies. Nothing wrong with that and in fact in some cases, such as my chocolate peanut butter pie, a nut crust is the ideal choice. But what was missing for me was the OTHER choice – a white, flaky, traditional pie crust just like Grandma used to make but without the gluten. So I embarked on a mission to make the perfect gluten free pie crust. The first thing I learned is you can’t let pie crusts intimidate you. It is not only possible to make a great gluten-free pie crust, it is completely do-able and many of those who have tried mine, say they prefer my gluten-free crust to regular wheat crusts they have had.
Here are my tips for making the perfect gluten free pie crust:
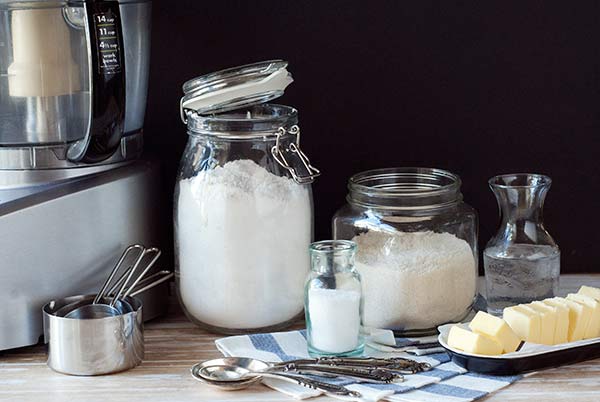
1. Cold, cold, cold! Get your ingredients cold before using them. Cut up your butter or shortening into small pieces and pop it in the freezer for 15 to 30 minutes before starting your pastry. Put ice cubes in your water for a good 10 minutes before using it to really chill it down.
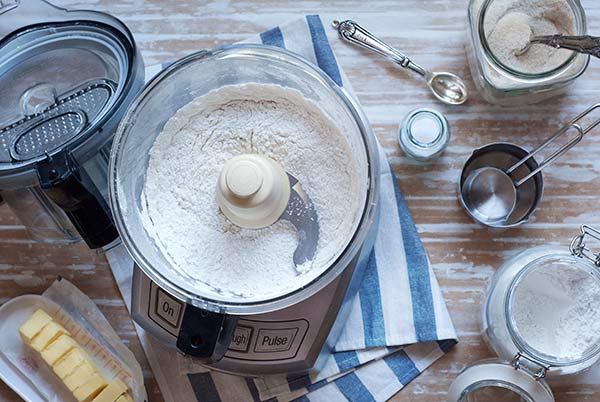
2. Use a food processor. The speed with which the food processor can combine the ingredients and cut in your butter or shortening is so much faster than if you do it by hand and results in a flakier crust. Of course if you don’t have a food processor, just cut the shortening or butter in by hand but work quickly and don’t over do it. Bigger pieces of butter or shortening are not only OK, but preferred.
3. Be skimpy on the water. The biggest mistake most people make in preparing pie crusts (whether it be gluten-free or not) is adding too much water. Add just enough so that the ingredients hold together when squeezed in your hand. Too much water will result in a tough crust.
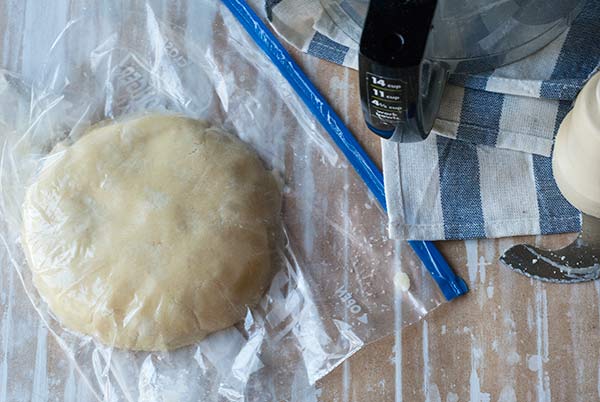
4. Give it a rest! Let your pie crust dough rest for at least an hour before rolling. Many people think this is to let the gluten rest, which would make no sense in a gluten-free recipe, but in truth what you are doing is letting the moisture distribute evenly. Never skip the resting period. Here’s an easy tip – pour your crumbly mixture into a large food storage bag and shape the dough into a disk using the bag to help you – it is less messy this way. Then just pop the bag into the fridge for the crust’s resting period.
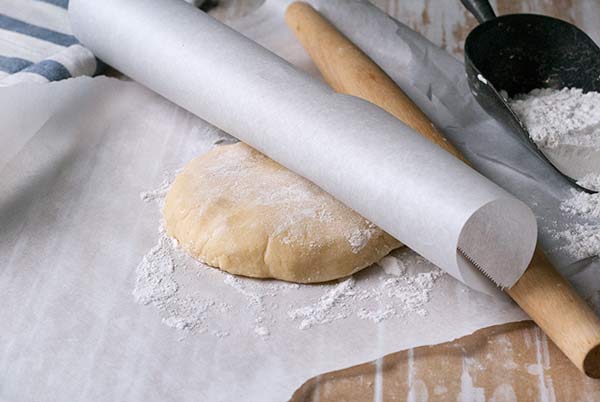
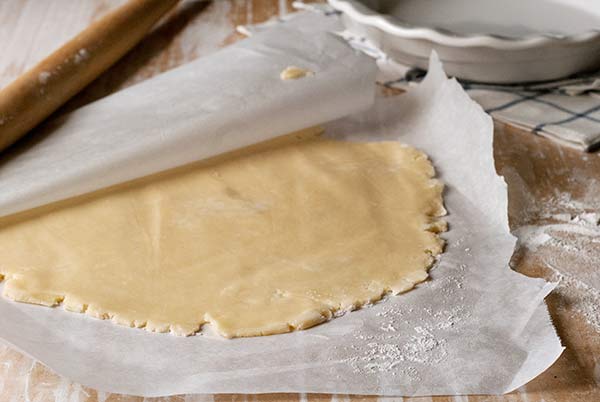
5. Extrude – don’t roll. Gluten-free pie crust is more fragile than regular pie crust as it lacks the sticking power of the gluten. It is much easier to employ the “extrusion method”. Simply place your dough on a piece of wax paper that is dusted lightly with gluten-free flour, then sprinkle a little more flour on the dough and top with another piece of wax paper and roll it out. This will help keep your crust in one piece. Using the wax paper also helps in transferring the dough to the pie plate. If a piece falls off or breaks, just pinch it back together, don’t be afraid to show your pie crust who’s boss.
6. Use great ingredients. The sum of the parts will only be as good as what you put in it. Start with a good, pastry quality all purpose gluten-free flour blend that is not grainy or cardboard tasting. For a perfect-just-like-Grandma-used-to-make pie crust you need a flour blend that has a high starch content and some xanthan gum. You need the crust to be flaky but still stick together. If you don’t have a brand you like then make your own using either super fine or Asian flours, they are milled much more finely than most. Also use the best quality butter you can buy and always use either kosher or fine sea salt. If you can not have dairy then substitute the butter with all vegetable solid shortening. In my opinion, the butter flavored shortenings do not produce as good a flavor as the regular, non-flavored. I prefer to use Organic All Vegetable Non-hydrogenated shortening from Spectrum. And yes, I add a bit of regular sugar to my pie crusts, it helps with browning and after all – it’s dessert!
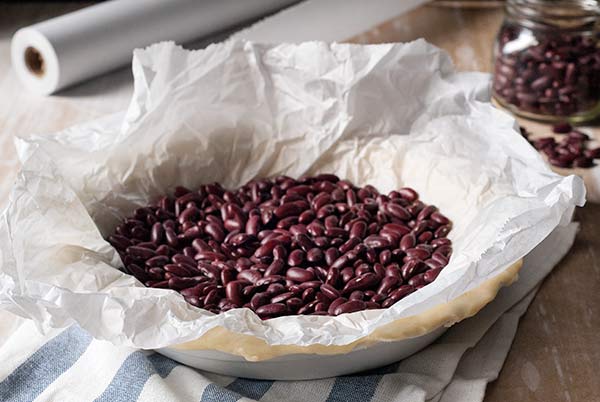
7. To “blind bake” (pre-bake the crust for use when the filling will not be baked such as cream and pudding pies) your crust place a piece of parchment or foil on top of the crust and fill with either pie weights or dried beans. I use dried beans, far less expensive and they can be used over and over again.
This recipe is for sweet pies, if using for a savory dish such as quiche, cut the sugar down to 1 teaspoon. At the end of the recipe is a variation for a Chocolate Pie Crust which is a unique twist for pudding-type or berry pies.
Shop This Post


Gluten Free Perfect Pie Crust Recipe
Ingredients
- ½ cup unsalted butter or solid, all vegetable non-dairy shortening
- 2 to 4 tablespoons cold water
- *1¼ cups All Purpose Gluten Free Flour Blend plus more for rolling
- 1 teaspoon kosher or fine sea salt
- 2 tablespoons sugar
Instructions
- Cut butter into ½ inch pieces and place in the freezer for 15 – 30 minutes.
- Add some ice cubes to the water and let it get ice cold while preparing the dry ingredients.
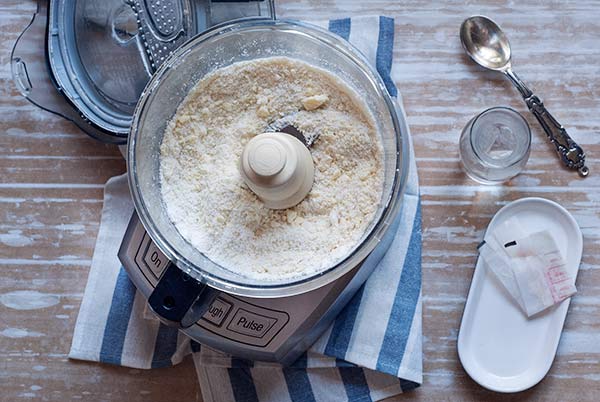
- Combine the flour blend, salt and sugar in the bowl of a food processor. Pulse 5 -6 times to combine. Add the butter and pulse 6 -8 times or until the mixture resembles coarse meal with some pea size pieces of butter.
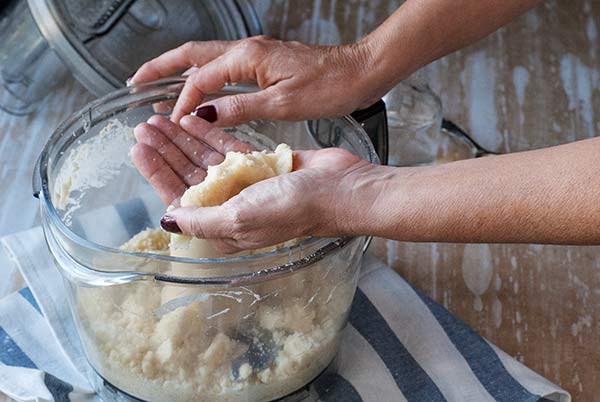
- With processor running, add ice water 1 tablespoon at a time until the mixture just barely starts to clump together. If you pinch some of the crumbly dough together and it holds then you have enough water, if not add more a little at a time. You do not want to add any more water than is absolutely necessary.
- Remove the dough from the machine and form into a disk. Wrap the disk in plastic wrap and refrigerate for at least one hour or for as long as 2 -3 days. Since the dough is so crumbly and does not hold together at this point, I find it easier (and far less messy) to pour the mixture into a large food storage bag and form it into a disk using the bag to help. Then just close up the bag and put it in the fridge. Remove dough from fridge 5 minutes before rolling.
- To roll the dough, lay a piece of waxed paper on a work surface and sprinkle with some flour blend. Lay the chilled disk on the floured paper, sprinkle with some more flour and lay on another piece of waxed paper. Roll the dough into a circle approximately 12 inches wide. Remove the top sheet of waxed paper and carefully transfer into a 9 inch pie plate and remove the waxed paper. Push the dough very gently down so it lines the bottom and sides of the pie plate. If the dough splits or breaks apart just push it back together. Trim the edge of the pie crust to about ½ – ¾ inch over hang. Tuck the overhang under and pinch the dough into a decorative finish.
To Pre-bake (or Blind Bake) a pie crust:
- Sometimes a recipe will call for a pre-baked or blind baked pie crust, here’s how to do that.
- Freeze the pie crust in the pie plate for at least 30 minutes.
- Preheat oven to 350 degrees.
- Place a piece of parchment paper (or foil) in the bottom and up the sides of the pie crust. Fill with dried beans, rice or pie weights. (I prefer dried black beans as they help distribute the heat better and are much less expensive than pie weights. I use the same beans over and over.) Bake the crust for 20 minutes. Remove the weights and waxed paper, poke a few holes in the bottom of the crust using a fork and return to the oven for 10 minutes or until golden brown.
- Let pie crust cool completely before filling.
Notes
Chocolate Pie Crust Variation: Add 1 ½ tablespoons cocoa powder to the dry ingredients and proceed as above. The dough may require just a tad more water. Make sure to brush off all the excess flour blend after rolling to keep the dark color.
Nutrition
Nutrition information is automatically calculated, so should only be used as an approximation.

The views and opinions expressed on this blog are purely the blog owners. This blog accepts free manufacturers’ samples and forms of cash advertising, sponsorship, paid insertions or other forms of compensation.


Hi Carol,
I tried making the pie crust using your recipe for gluten free flour, but i used coconut oil for the butter. I put it in a ceramic dish and smoothed it out so that it was about a bit less than 1/2 inch thick all around my ceramic baking dish. I ended up using less of my dough because it was a small dish like 3 by 6 inches square dish. So anyway I cooked for 1/2 hour. When I took it out it crumbled in my hands very easily if i pressed on it with my fingers gently. I wonder if it is supposed to be very crumbly. I wanted the consistency to feel thick but soft, but it seemed more dry and crumbly and soft. I added only 1-2 tablespoons of water. I think I added enough water. But I melted my coconut oil before adding it to my flour, because I couldn’t understand how the coconut oil could dissolve well in the flour if it is hard and cold….(I know you said to put it in cold). But would that make a big difference? Also I did not add xanthan gum because I get stomach discomfort from that chemical. (I am sensitive to additives such as guar gum, xanthan gum, and citric acid due to gut disfunction). But I read other gluten free recipes for a crust in a book I am reading and she doesn’t even use xanthan gum so I thought it would be ok not to use it. Should it work ok without it or do you always use it? All the recipes in this book i am reading on gluten free pies, does not require adding xanthan gum when baking the crust. Here is an example recipe in her book called “gluten-free and vein Pie by Katzinger” here (I know this is not the recipe I did-I did your crust recipe but I just want to show you that she uses a similar recipe but doesn’t use xanthan gum) : 2 cups brown rice flour, 1/3 cup potato starch, 1/3 cup tapioca flour, 1 tbsp evaporated cane juice, 1/4 tsp salt, 1/3 cup plus 2 tablespoons olive oil.
(as you can see it doesn’t even say the olive oil should be frozen)…
I know I am comparing your recipe to hers and you guys do use different ingredient, but I just wanted to ask you why do you think she doesn’t use xanthan gum? And do I really need xanthan gum in your recipe to get a crust that is more firm/less crumbly than what I got.
Thanks,
Marianna
Coconut oil and butter do not bake the same so yes, it would make a difference. If you can do dairy, I suggest you use solid vegetable shortening or dairy free buttery sticks instead of the butter. The xanthan gum helps keep the dough together, it can be left out but that’s another reason why it could have been crumbly.
Hi there, well. I wanted to say a HUGE thank you to you! I have been flopping and failing at making gluten free pies and pie bases for a little while and my family have suffered the results in the past! BUT, this weekend, I followed your recipe carefully (while adding a little more because I have a 23cm tart dish) and it worked beautifully and I made the most amazing gluten free chocolate tart. Thank you. My husband was delighted as were our neighbours and my work colleagues today (as I brought them some) thank you. This worked perfectly and the tips are so helpful! Thank you. Marisa, Brisbane, Australia
Do I have to prebake the bottom crust if I am making an apple pie?
Hi Jan,
No, you don’t need to prebake the crust for an apple pie. Usually, you’ll only need to prebake the crust for a no-bake pie or one that has a very short baking time or if the recipe specifies that. Hope you enjoy!
xo,
Carol
I made this with Bob’s Red Mill 1 to 1 GF flour; doubled it, skipped the sugar and salt, used butter, and followed the steps – including putting the dough into a baggie and into the fridge for a couple of hours. I ended up letting it get soft again before using my fingers to smoosh it into a square glass dish. Then I rolled out the top piece. I made a gorgeous turkey pot pie! The crust is soooooo flaky! I will definitely use this as my new go-to for all pies I make. Love it. Thank you :)
Best pie crust ever! This was amazing! Printing it to use again and again, as the hints were essential to the success of the crust. My guests couldn’t believe it was gluten free.
Thank you Patty! So happy you and your guests enjoyed it!
xo,
Carol
I like this crust. Its pretty much a normal pie crust recipe, just using gluten free flour. The main thing is that the handling is different. Gathering the disk in a plastic bag and rolling out between two sheets of wax paper is brilliant! I think, if you are an experienced pie crust maker, you can pretty much use your normal recipe, if you follow these handling steps, just substituting a gluten free flour mix, My crust did come apart a bit when transferring it to the pie pan, but it was easily patched using the trimmings from around the edge. You might have to patch it together a bit, but not to worry, this doesn’t affect the integrity or appearance of the finished crust. The crust was indistinguishable from a flour crust, even the non gluten free family members commented on how good it was. I used Bob’s Redmill 1 to 1 Gluten Free Flour Mix.
Thanks Arnie! Glad you like it :)
In the eternal quest to find a pie crust as good as my mom’s and grandmother’s, I missed my chance, since I have had to be GF for a couple of decades now. But yours is as close to perfection as I have ever come. Waiting for my strawberry pie to chill so I can have a whole piece, instead of just nibbling the edge off the crust. Your recipe, directions, and tips are great. Thank you!
You’re very welcome, Karen! And thank you so much for the kind words! I’m so happy you like this recipe. That strawberry pie sounds delicious! Enjoy :)
I’ve been making this pie crust for the last 6 years. Everyone loves it, even those who are not gluten free. It’s better than any other crust I’ve tried in my gluten free baking and better than any store bought I’ve tried. It does make a thick crust so I roll as thin as possible.
This is my go-to pie crust recipe. Thank you! I’ve made pies that even the harshest gluten-free critics absolutely love using this recipe. I’ve even made it with butter substitute since I can’t have dairy either now that I’m nursing. I use earth balance and leave out the salt and it still makes a great crust. Five stars.
Thank you, Jessica! I’m so happy to hear that you love it and I appreciate you taking the time to let me know!
This was yummy! I’ve never made spaghetti squash before and I’m not sure if it’s supposed to me soft or not when it’s done. My squash was on the larger side so maybe I should have cooked it longer.