Essential Make-Up How-To’s
Updated Jun 25, 2018, Published Nov 01, 2017
This post contains affiliate links. Please see our disclosure policy.
How to Find Your Best Brow Shape:
Tools:
• A pencil or makeup brush
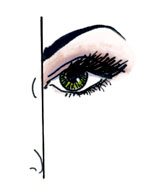
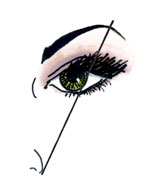
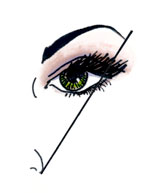
When shaping brows, there are three angles you should bear in mind that relate to your individual eye shape. Here’s how to find them:
1) Hold a pencil or makeup brush along the side of your nose. The place where it meets your brow is where you should begin filling.
2) Next, angle the pencil across the iris from the tip of your nose. Where it crosses your brow is where your arch should be.
3) Finally, angle the pencil to the end of the outer corner of your eye from the tip of your nose. This is where your brow should end.
Using these angles as the guideline for filling your brows will give you the perfect frame for your gorgeous eyes!
How to Add Drama to Your Pencil Liner
Tools:
• A kohl eye liner pencil of any kind
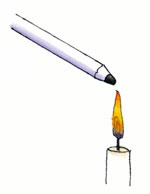
• An open flame (a lighter is great because of its size, but you can also use a candle or a gas stove top)
This is a trick from the glamorous days of old Hollywood, but it’s absolutely relevant today!
1) To soften the pencil and enhance the smudge, hold the tip of the pencil in the flame for a very quick second. Don’t even count out the second.
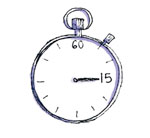
2) Wait about 15 seconds for the pencil to cool off. It gets very hot so you have to let it sit for a bit. Then always test the temperature of the pencil on the underside of your wrist before you go anywhere near your eye!
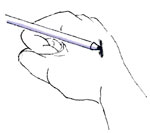
3) Roll it on the back of your hand to shape the tip back into a point while it’s solidifying.
Voila! When you use your pencil, the smudge will be intensified and long lasting. You can even use this in your waterlines.
How to Use Concealer to Brighten Your Eyes
Tools:
• Cream or liquid concealer
• Your finger or a brush
Make your liquid or cream concealer do triple duty in highlighting and brightening your eyes!
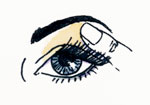
1) With your ring finger or a brush, spread concealer over your lid. This creates a base to stop slippage, brightens the shades, and hides any uneven coloring.
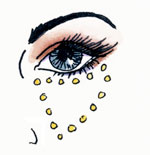
2) Apply your concealer in an upside-down triangle shape under the eye for bag and circle coverage.
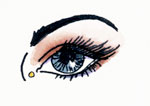
3) For a wide-awake look, place a dot of concealer right by your tear duct on the inner side. Blend the concealer.
How to Make Lipstick Last
Tools:
• Lipstick
• Finishing powder (or foundation if you need to substitute)
There are literally dozens of ways to make your lipstick last, but this is one of my favorites.
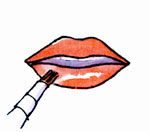
1) Apply a light layer of lipstick to your lips with a brush or straight from the tube.
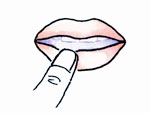
2) Pat clear finishing powder over the lipstick with your finger or a small brush. You can use foundation in a pinch, but it will mute the color a bit.
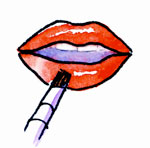
3) Apply another layer of lipstick on top of the finishing powder.
How to Contour & Highlight Cheekbones
Tools:
• Bronzer or foundation a few shades darker than your usual shade
• Small foundation brush
• Highlighting cream or powder
For something so simple, this trick adds a powerful punch to your overall look. Visually slim your face and draw attention to those gorgeous cheekbones with this quick trick.
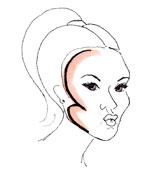
1) Use foundation that’s a few shades darker than your usual or a matte bronzer. Make a fishy face and trace the letter E from the middle of your hairline, with the middle tail under your cheekbones (pulled into prominence by your flattering fish expression) and the bottom tail along the edge of your chin.
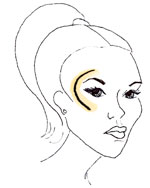
2) With highlighting cream or powder, trace the letter C around the outer corner of your eye, from above the brow to below the eye.
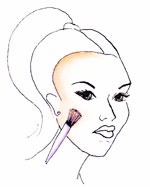
3) Softly blend the lines and enjoy!
ABOUT THE AUTHORS:
Afton Jones discovered that the reason her eyes swelled and watered at random was due to gluten in her mascara, so she went on the hunt for gluten-free makeup. Upon finding that no accurate resources existed, she created her own. Visit Afton on the webat www.glutenfreemakeupgal.com.
Erin Rogers Pickering is a gluten-free wife and mother living just outside of New York City where she teaches watercolor workshops. Find Erin’s work in her online store ErinGoPaint on www.etsy.com and follow her illustrated gluten-free journey at www.theglutenfreeillustrator.blogspot.com.


