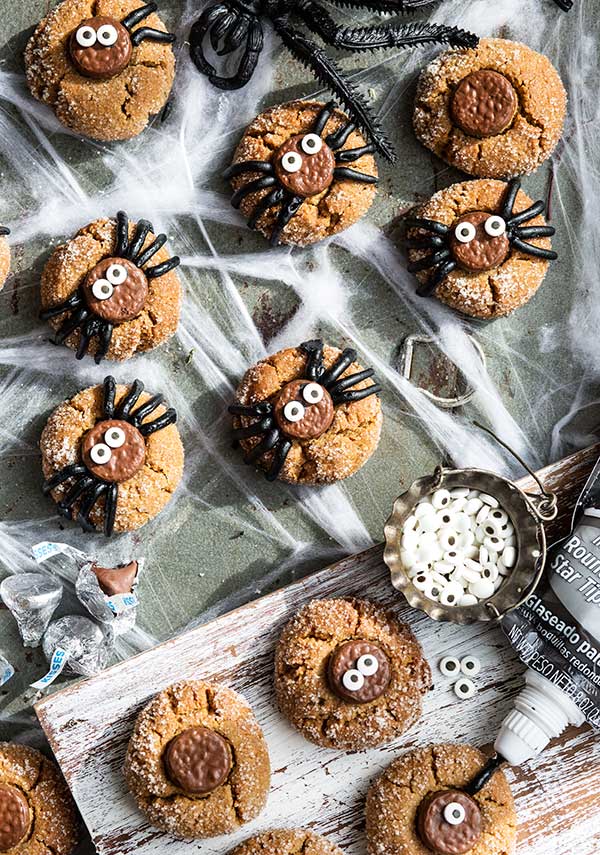
Gluten Free Spider Cookies Recipe
Updated Feb 15, 2021, Published Oct 27, 2017
This post contains affiliate links. Please see our disclosure policy.
Know someone with arachnophobia? I have the best way to help them face that fear … cookies! This Gluten Free Spider Cookies recipe takes the fear factor out of spiders and makes them oh-so cute!
These are super simple to make and are a great little treat for Halloween parties, office gifts, to share with neighbors or friends, or just to get crafty in the kitchen to get in that Halloween spirit. Grab the kids or grandkids if you have them – they’ll love to help make (and eat) these sweets.
In my experience, it’s always a good idea to make and serve treats that are allergy friendly around Halloween, especially when you’re serving something as cute as these cookies. That’s why I used SunButter, a sunflower seed spread, in these instead of peanut butter.
That reminds me – have you heard of the Teal Pumpkin Project? This project is making people aware of the need for allergy friendly trick-or-treating. You put a teal pumpkin outside your home and that shows people that you’re passing out things that are safe for kids with food allergies.

Gluten Free Spider Cookies Recipe
Ingredients
- 1 cup creamy SunButter
- ½ cup honey
- 1 large egg
- ¾ cup gluten free all-purpose flour
- 1 teaspoon baking powder
- ¼ teaspoon baking soda
- ¼ cup sugar
- 20-24 chocolate kisses, unwrapped
- Mini candy eyeballs
- Black decorating icing
Instructions
- Preheat the oven to 350 degrees. Line 2 baking sheets with parchment paper.
- In a large bowl, combine the SunButter, honey, and egg. Stir well. Add the flour, baking powder, and baking soda. Stir until it forms a thick dough. Place sugar in a small bowl.
- Roll into golf ball sized balls, roll in sugar, and place on prepared baking sheets, 2 inches apart. Insert a chocolate kiss into each ball, tip side down.
- Bake for 20 minutes or until the cookies are golden and set. Let cool on the pans.
- Put a small drop of icing on each candy eyeball and place on top of the chocolate kiss where the spider’s eyes would be. Pipe 4 lines coming off the chocolate kiss down each side of the cookie for legs. Let the icing set for about 15 minutes before serving.
Nutrition
Nutrition information is automatically calculated, so should only be used as an approximation.
The views and opinions expressed on this blog are purely the blog owner’s. This blog accepts free manufacturers’ samples and forms of cash advertising, sponsorship, paid insertions or other forms of compensation. Affiliate links may be included in this post.


These look amazing. Can’t wait to try them – thanks!
These are the cutest and I know my kids would love them!