
Gluten Free Easy, Easy, Easy! French Bread Recipe
Updated Mar 30, 2026, Published Nov 11, 2011
This post contains affiliate links. Please see our disclosure policy.
Today is supposed to be a very lucky day – 11/11/11. And personally, I am inclined to believe it. It was lucky for me and I think lucky for you. I had a gluten free bread baking recipe breakthrough.
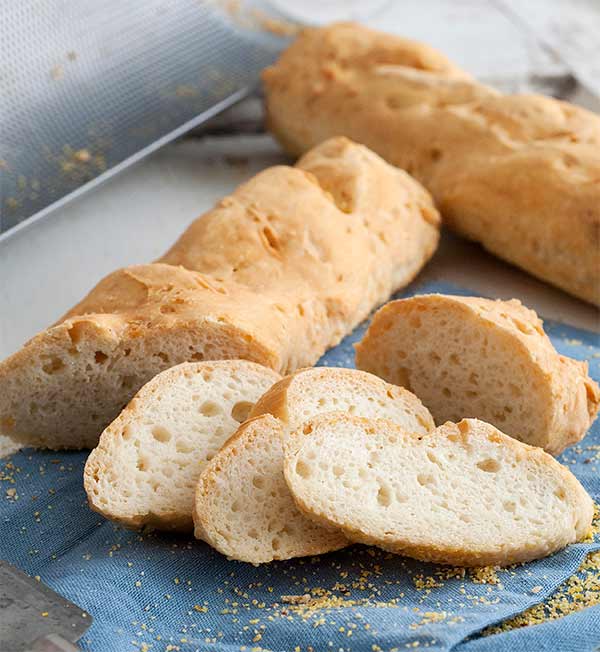
Table of Contents
how i came up with this particular gluten free french bread recipe
As a person who spends most of her time creating gluten free recipes you can imagine that I get my fair share of emails asking if I have a really good recipe for gluten free bread. Before going gluten free I made a few loaves of bread (with varying degrees of success) but I was by no means a bread baker. When I get these emails I think “Why ask me? Why not ask a bread baking expert?”
But the more I thought about it, the more I realized, I am probably the perfect person to ask. Why? Because:
1. I went for probably 15 years without eating bread so I know I can live without it – I would rather not eat bread than eat yucky, grainy, crumbly bread.
2. Although I love great food but I am also kind of lazy so I am always looking for the easiest way to make something.
3. Yeah, I don’t find it “relaxing” to knead dough by hand for 15 minutes. I wish I was that kind of person, but sadly when I do menial tasks for any period of time, my mind starts to wander and that is never a good thing!
4. I am success driven, persistent and some might even say a little OCD – I will keep at something until I get it right.
homework
So, I decided to put my mind to making great gluten free breads. I decided to start with gluten free French Bread. I did my homework, I studied first the traditional French Bread recipes and methods. Then I looked at gluten free ingredients and studied how to make them work better and finally, I baked and baked and baked!
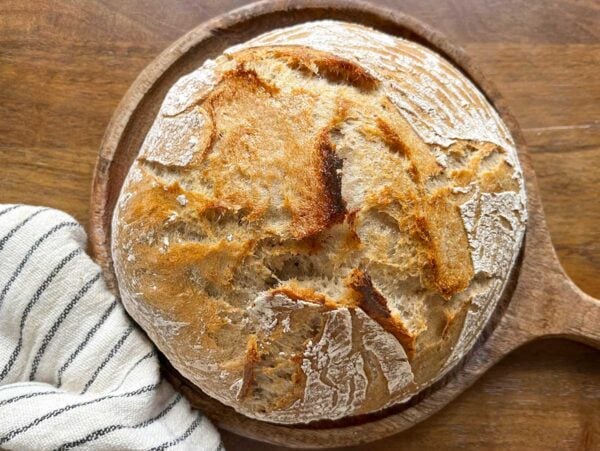
I played around with flours and baking times and methods until I got a gluten free French Bread recipe that was crunchy on the outside, tender on the inside, beautifully browned, tastes like what French Bread should taste like and was easy to make. I threw away a lot of bread. In addition, I enlisted everyone I came across (including a good number of whom are regular gluten-eaters) in blind taste testing and finally, I am pleased to say, came up with a recipe I am happy with! And I think YOU will love!
And you want to hear the very best thing? It is actually EASIER to make gluten free French Bread than it is to make the gluten-filled kind! Yes, you heard right – EASIER! No kneading, no double rising (I tried, better without) no hours until bread is ready. You can actually have lovely, perfect gluten free French Bread in about an hour and a half, start to finish!
Ok… so here are some tips I discovered:
Equipment
You are going to need a mixer – it is going to do pretty much all the work for you. You also need a French bread pan – gluten free bread needs support when it is rising and baking. Fortunately, you can get one for under $20.00 – considering the cost of decent gluten free bread, an investment so worth it! The pans come either perforated or solid. I used both in testing and it didn’t make a huge difference but I did like the results from the perforated pans slightly more. And finally, unless you are dead certain your oven is totally accurate, run over to the hardware or grocery store and grab an oven thermometer for about 4 bucks – you should have one anyway!
Kneading
Remember when the internet was all abuzz about no-knead bread? Ha! That’s old news to us gluten free bakers! 3 minutes in the mixer and that’s pretty much it, no kneading what-so-ever!
Yeast
I got the best result from Dry Active Yeast. It needs to be “active” so if you have had a jar sitting in your fridge since you can’t remember when, go get a new one – it lasts about 6 months refrigerated, after that it may not be good any longer. If you do store your yeast in the fridge then it will take longer for the yeast to “proof.” You want the yeast mixture to pretty much double in size and be all foamy.
Flours
After testing all sorts of different flour combinations, what worked best was a simple combo of white rice flour, sweet rice flour (also called glutinous flour) and tapioca starch. I used all Asian flours (Erawan Brand) which are more finely milled and cost a fraction of the flours you get in the health food store. I also tested this recipe using my own flour and it came out really great (well…dahaaa!) and the dough was a tad easier to work with.
Gum and Fat
I found that mixing the xanthan gum with the fat (olive oil) before adding it to the batter made it work better. I wish I could tell you why, just trust me on this.
Prep
Get all your ingredients out, mix your yeast, blend the xanthan gum with the oil and lightly beat your eggs before you start to mix, it makes it easier. Do the steps in order as I give you in the recipe.
The Dough
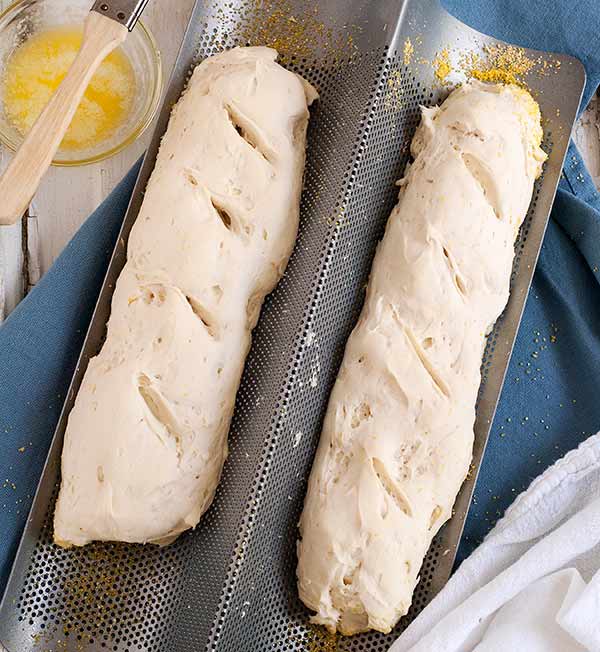
If you were used to bread making in a former pre-gluten-free life you will think there is not enough flour in the dough because it has a consistency more like a thick batter than dough. Resist with every fiber of your being from adding more flour! This is just the way gluten free bread dough is. You need to spoon the dough into the pans and shape it with a spatula – it won’t magically turn into pretty ovals unless you do this.
Slashing the Dough
Cutting 3 or 4 diagonal slashes into the top of the dough will help the steam escape while it is baking giving you a lovely, tender texture.
Prepping the Pans
Either spray your French Bread pans with gluten-free, non-stick cooking spray or brush with oil before putting the dough into the pans to rise. For a really authentic bottom, sprinkle a teaspoon of cornmeal on the bottom of the pans after you oil them up. It isn’t completely necessary but it does add that certain je ne se qua (fancy French term for “a certain something”). If using the perforated pans, place them on top of a baking sheet to oil and dust with cornmeal or you will have a mess to clean. However, do not bake the bread on the baking sheet. Instead, just put the French bread pan right on the oven rack.
Browning
I tested everything I could think of to get the perfect brown on the French Bread and what I found gave the best color came from brushing the loaves with melted butter just before baking. The good news is that they also came out beautifully browned with a brushing of melted Earth Balance as well – keeping the bread totally dairy free if need be.
Humidity
To get that crunchy crust and tender inside so characteristic of good French Bread it should bake in a humid environment. This is easily created by putting a pan of hot water into the oven while it preheats and just leaving it there while the bread is baking. You can also spritz the oven occasionally with water from a spray bottle but then you have to remember to do it whereas the pan of water just sits there and does its job.
Here’s how the whole thing goes:
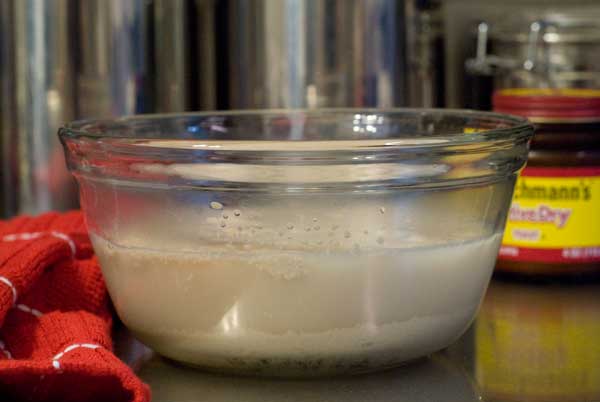
Mix the yeast, sugar and warm water – whisk to dissolve.
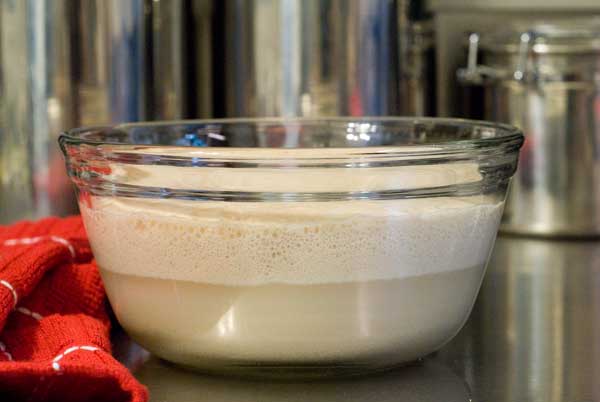
Let the yeast “proof” until foamy and doubled in volume.
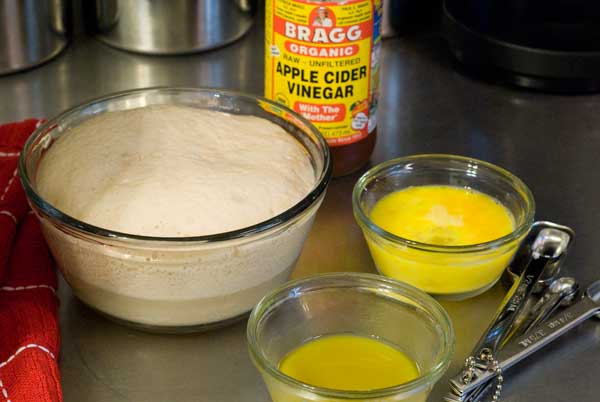
Get all your ingredients ready before mixing.
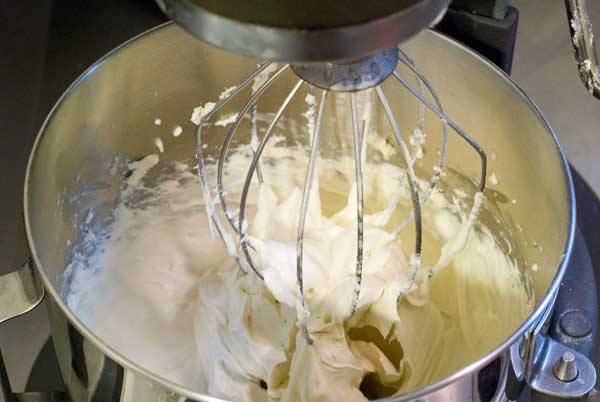
The dough will look more like batter than dough.
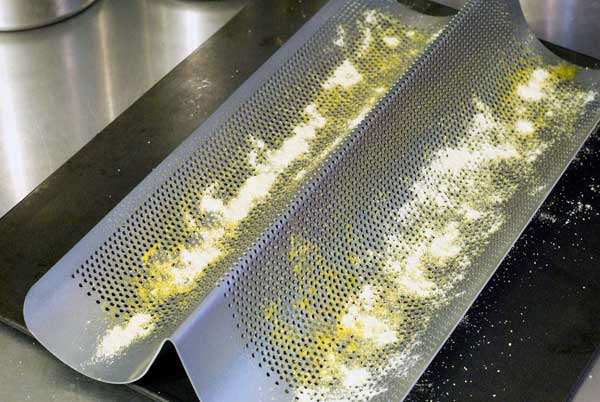
Grease the pan with oil and sprinkle with some cornmeal.
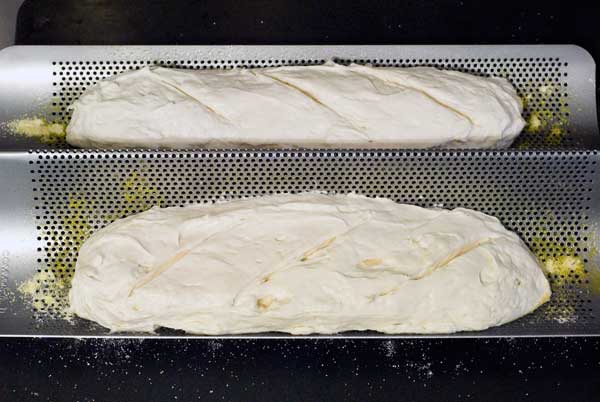
Spoon batter into pans, shape into ovals and slash the top 3 or 4 times.
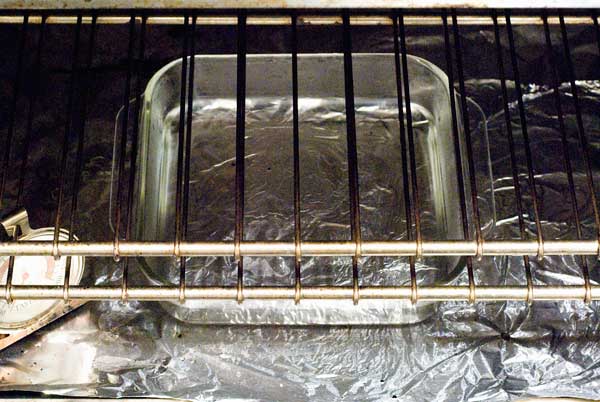
Place a pan of hot water into the bottom of oven.

Gluten Free Easy, Easy, Easy! French Bread Recipe
Ingredients
- 2 tablespoons Dry Active Yeast
- 2 teaspoons sugar
- 1½ cups warm water, it should be pretty warm to the touch but not hot
- 3 teaspoons xanthan gum
- 2 tablespoons olive oil
- 1½ cups super fine or Asian white rice flour*
- ½ cup superfine or Asian sweet rice flour*
- 1 cup tapioca starch*
- 1½ teaspoons kosher or fine sea salt
- 2 large eggs, lightly beaten
- 1 teaspoon apple cider vinegar
- 2 teaspoons cornmeal, optional
- 2 tablespoons butter or Earth Balance, melted
Instructions
- Combine the yeast, sugar and warm water in a bowl about twice the size of the mixture and whisk to dissolve the sugar. Let sit for 5-6 minutes (10 if the yeast has been in the fridge) or until it is foamy and doubled in size.
- In a small bowl stir the xanthan gum with the olive oil until the xanthan gum is dissolved.
- Combine the flours, tapioca starch (or gluten free flour blend) and salt in the bowl of a mixer fitted with a whisk attachment (or just the regular beaters – don’t use a dough hook) and mix to combine. Add the yeast mixture, xanthan gum mixture, eggs and vinegar and mix on low to combine. Scrape down the sides of the bowl once. Turn the mixer to high and mix for 3 minutes.
- Spray a French bread pan (with 2 forms) with gluten-free, non-stick cooking spray or brush with more olive oil and sprinkle a teaspoon of cornmeal onto the bottom of each pan.
- Spoon the batter into the forms and shape into an oval with a spatula. Using a razor blade or sharp knife cut 3 or 4 diagonal slashes on top of each loaf. Cover the loaves with a clean kitchen towel and set in a warm, draft-free place to rise. Let rise for 30 minutes or until the loaves have doubled in size.
- Place a baking pan on the floor of your oven (or on the bottom shelf) and fill it with about an inch of really hot water. Position the rack you are baking the bread on in the middle of the oven. Turn the oven on and preheat to 400 degrees.
- Brush the top of the loaves with the melted butter or Earth Balance and bake for 40-45 minutes or until the loaves are golden brown and sound hollow when tapped. Let cool in the pan for 5 minutes then remove to a wire rack to finish cooling.
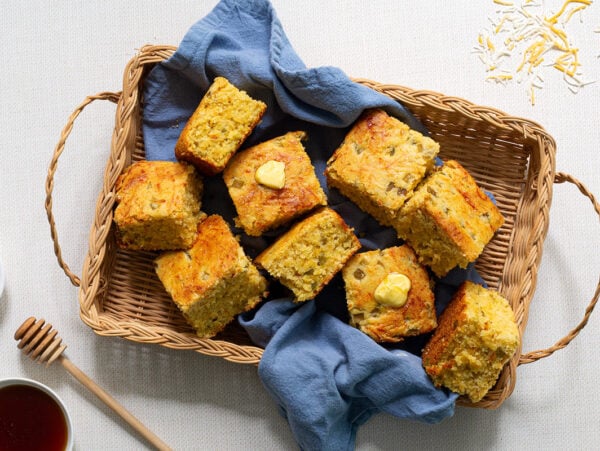
- You can also make crusty rolls by scooping the dough into 2 standard sized muffin tins, letting them rise 30 minutes and baking for about 20 minutes.
Notes
Nutrition
Nutrition information is automatically calculated, so should only be used as an approximation.
Shop This Post


You had me at “Easy, Easy, Easy”! I must try this recipe!
haha! Yes, you must!
Those are beautiful and do not even look gluten free! They look normal! I can’t wait to try them, I’m always looking for gluten free recipes and dining to share on my site, thank you. :) Deborah
Thank you Deborah!
That bread looks fabulous, Carol! That’s one of the best homemade gluten-free breads I’ve seen – and it does look so easy. (I will say, though, I’ve never made the traditional, gluten-filled French bread. I actually have little experience in bread making.) Great work!
Thanks Zoe and trust me – it is easy!
I subbed the flours for 3 cups gluten free flour and my dough/batter was runny and spread. I had to block off the ends of the pan so it didn’t run everywhere. We will see if it bakes properly.
I have so many sensitivities that I technically have to do grain free, but I wanted to try this and see if I could slowly start to modify it to be truly grain free .
teehee, like you, I often wonder, “why the heck does this person think I know this?” Then I step back and try to feel flattered that people think I’m smart ;) Wonderful post, I love that you have taken the time to fully describe every important bit of the ingredients and method. I know many people will appreciate this!
Thanks Cara and yes, I do feel flattered as should you!
Nice job! And now it it our lucky day because we have a new recipe to try this weekend. Thanks!
Ah, thanks Kate!
I’ve given up on gluten-free French bread because there seem to be so many steps to most recipes and I, too, am lazy that way. Guess I’ll have to dig my French bread pan out of the basement and give it another try.
Well, I am the queen of lazy so yep, go down to the basement and dig ’em up! xo, c
This looks sooooo easy!! I want to make bread so bad, but I am kind of lazy and don’t want to do the kneading and waiting and kneading. I do have a mixer. I am definitely going to make this. BTW- does it freeze well? I like to keep bread in my freezer to have with soups.
Thanks Stephanie and YES, it freezes very well. Just wrap tightly and freeze!
Carol those are gorgeous! Congratulations. OCD comes in handy sometimes, doesn’t it :) I think I might be taking french bread to our Christmas dinner this year! Thank you.
Thanks Maggie and yes, fortunately being a little OCd has purposes other than driving those around me crazy :) xo,c
Carol – are there are any modifications for baking at higher altitudes?
Hi Sean,
I live like an inch of two above sea level (ok probably an exaggeration but the Gulf of Mexico is right out my front door and it is almost level with the ground) so I don’t have personal experience with high altitude baking but I did some research for you. It seems that yeast proofs faster at high altitudes so you should most likely cut back on the rising time, do not leave out the salt (that helps slow down the rising time) in fact one article suggested increasing the salt by 25% – just fyi I made 2 batches using more salt and we loved it, I decreased the amount because it seemed to rise better here with less but the taste was the same. One article suggested decreasing the amount of yeast by 25%. Another said to increase the liquid by 1 tablespoon above 3000 ft, 3 tablespoons above 5000 ft and 5 tablespoons above 7000 ft. I got conflicting information about adjusting time and temperature – some said increase the temp and lower the baking time and some said the opposite – oy! Here is a link that should help, I trusted it the most
https://www.livestrong.com/article/495507-gluten-free-baking-at-a-high-altitude/
Good luck and please, if you have a chance – report back here with what you find out.
Hi Carol – I made your French bread tonight and decided to follow the recipe as is. Two small problems; I forgot to get an oven thermometer, and I forgot the brushed on butter until about half way through. All that aside, the bread came out looking and smelling amazing (I took pics and will upload later). However, I find the inside of the sliced French bread to be “tacky” to the touch, if that makes any sense. It almost seems like it wasn’t baked quite enough….maybe another 10 minutes or so? What would happen if I over-baked the bread? Like you, I will try, try again!
BTW, I’ve never ever made bread before. Is proofing yeast supposed to smell that yucky? ;)
Hi Sean – haha proofing yeast has a very “yeasty” smell. My guess is that your oven may run a tad hotter than mine so just turn it down 25 degrees and cook longer – 10 minutes or so. I don’t think you will over bake it. You would have to leave it in a really long time to overbake it. Make sure the bread sounds hollow when you tap it. Also I got a few loves when I was working on the recipe that were a bit wet inside – they were great toasted so don’t toss it out!
Good job an your first loaf of bread :) And make these little adjustments and I think all will be well! :)
After almost a day & half since baking them, the bread was still so moist and delicious, I decided to take it into work and try it on one of my GF co-workers (there are about 7 of us – we call ourselves The Glutineers). She loved it, so I let the rest of the group know that I had “from scratch” French bread with real butter available. Within a couple hours I had one marriage proposal and an offer to buy all future loaves. :D
I am baking two more loaves tonight for that first co-worker; she also has 2 daughters who need to eat GF. I will be trying the reduction in temp and addition of time to see if that makes a difference although with that loaf today, I would not change a thing.
Thank you again, Carol, for this wonderful, incredible, fantastic and EASY recipe, and also for being so generous with your time in answering my questions.
THANK YOU!!!!!!!!
so I just made these- I made the rolls, they are tasty- but mine came out gummy on the inside- a lot like Chebe, if you have had that. It was definitely done on the outside. SO I will try reducing the temp and baking a bit longer next time.
Since oven temps varry a lot, that sounds like a good plan!
This is a great recipe, Thank You
Thanks Brenda