
Gluten Free Easy, Easy, Easy! French Bread Recipe
Updated Mar 30, 2026, Published Nov 11, 2011
This post contains affiliate links. Please see our disclosure policy.
Today is supposed to be a very lucky day – 11/11/11. And personally, I am inclined to believe it. It was lucky for me and I think lucky for you. I had a gluten free bread baking recipe breakthrough.
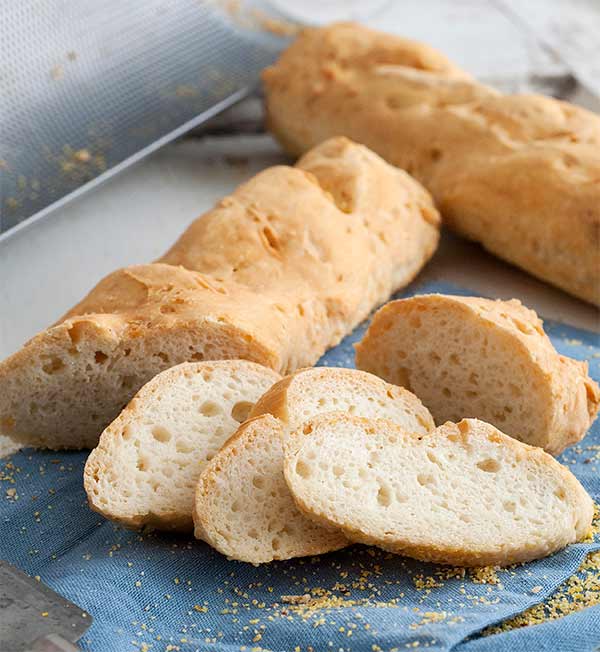
Table of Contents
how i came up with this particular gluten free french bread recipe
As a person who spends most of her time creating gluten free recipes you can imagine that I get my fair share of emails asking if I have a really good recipe for gluten free bread. Before going gluten free I made a few loaves of bread (with varying degrees of success) but I was by no means a bread baker. When I get these emails I think “Why ask me? Why not ask a bread baking expert?”
But the more I thought about it, the more I realized, I am probably the perfect person to ask. Why? Because:
1. I went for probably 15 years without eating bread so I know I can live without it – I would rather not eat bread than eat yucky, grainy, crumbly bread.
2. Although I love great food but I am also kind of lazy so I am always looking for the easiest way to make something.
3. Yeah, I don’t find it “relaxing” to knead dough by hand for 15 minutes. I wish I was that kind of person, but sadly when I do menial tasks for any period of time, my mind starts to wander and that is never a good thing!
4. I am success driven, persistent and some might even say a little OCD – I will keep at something until I get it right.
homework
So, I decided to put my mind to making great gluten free breads. I decided to start with gluten free French Bread. I did my homework, I studied first the traditional French Bread recipes and methods. Then I looked at gluten free ingredients and studied how to make them work better and finally, I baked and baked and baked!
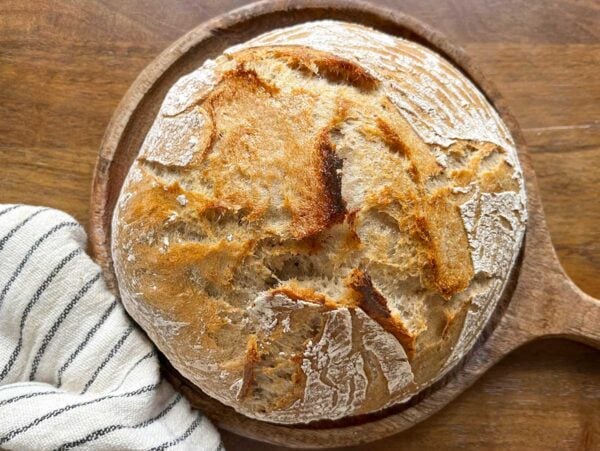
I played around with flours and baking times and methods until I got a gluten free French Bread recipe that was crunchy on the outside, tender on the inside, beautifully browned, tastes like what French Bread should taste like and was easy to make. I threw away a lot of bread. In addition, I enlisted everyone I came across (including a good number of whom are regular gluten-eaters) in blind taste testing and finally, I am pleased to say, came up with a recipe I am happy with! And I think YOU will love!
And you want to hear the very best thing? It is actually EASIER to make gluten free French Bread than it is to make the gluten-filled kind! Yes, you heard right – EASIER! No kneading, no double rising (I tried, better without) no hours until bread is ready. You can actually have lovely, perfect gluten free French Bread in about an hour and a half, start to finish!
Ok… so here are some tips I discovered:
Equipment
You are going to need a mixer – it is going to do pretty much all the work for you. You also need a French bread pan – gluten free bread needs support when it is rising and baking. Fortunately, you can get one for under $20.00 – considering the cost of decent gluten free bread, an investment so worth it! The pans come either perforated or solid. I used both in testing and it didn’t make a huge difference but I did like the results from the perforated pans slightly more. And finally, unless you are dead certain your oven is totally accurate, run over to the hardware or grocery store and grab an oven thermometer for about 4 bucks – you should have one anyway!
Kneading
Remember when the internet was all abuzz about no-knead bread? Ha! That’s old news to us gluten free bakers! 3 minutes in the mixer and that’s pretty much it, no kneading what-so-ever!
Yeast
I got the best result from Dry Active Yeast. It needs to be “active” so if you have had a jar sitting in your fridge since you can’t remember when, go get a new one – it lasts about 6 months refrigerated, after that it may not be good any longer. If you do store your yeast in the fridge then it will take longer for the yeast to “proof.” You want the yeast mixture to pretty much double in size and be all foamy.
Flours
After testing all sorts of different flour combinations, what worked best was a simple combo of white rice flour, sweet rice flour (also called glutinous flour) and tapioca starch. I used all Asian flours (Erawan Brand) which are more finely milled and cost a fraction of the flours you get in the health food store. I also tested this recipe using my own flour and it came out really great (well…dahaaa!) and the dough was a tad easier to work with.
Gum and Fat
I found that mixing the xanthan gum with the fat (olive oil) before adding it to the batter made it work better. I wish I could tell you why, just trust me on this.
Prep
Get all your ingredients out, mix your yeast, blend the xanthan gum with the oil and lightly beat your eggs before you start to mix, it makes it easier. Do the steps in order as I give you in the recipe.
The Dough
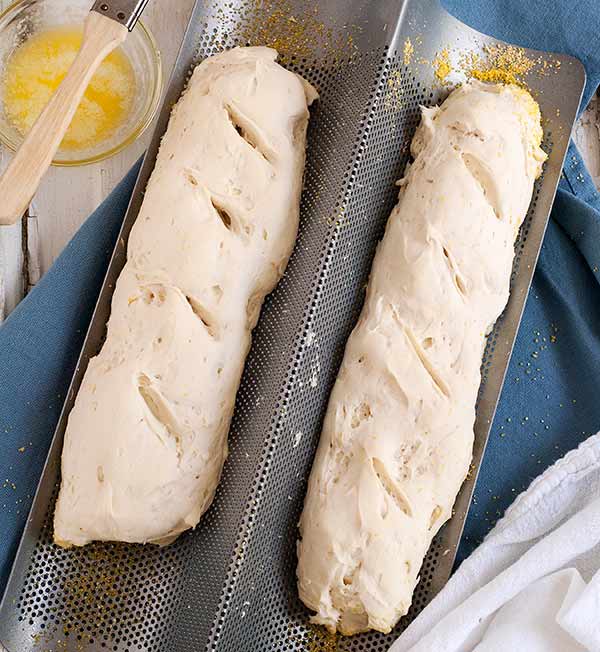
If you were used to bread making in a former pre-gluten-free life you will think there is not enough flour in the dough because it has a consistency more like a thick batter than dough. Resist with every fiber of your being from adding more flour! This is just the way gluten free bread dough is. You need to spoon the dough into the pans and shape it with a spatula – it won’t magically turn into pretty ovals unless you do this.
Slashing the Dough
Cutting 3 or 4 diagonal slashes into the top of the dough will help the steam escape while it is baking giving you a lovely, tender texture.
Prepping the Pans
Either spray your French Bread pans with gluten-free, non-stick cooking spray or brush with oil before putting the dough into the pans to rise. For a really authentic bottom, sprinkle a teaspoon of cornmeal on the bottom of the pans after you oil them up. It isn’t completely necessary but it does add that certain je ne se qua (fancy French term for “a certain something”). If using the perforated pans, place them on top of a baking sheet to oil and dust with cornmeal or you will have a mess to clean. However, do not bake the bread on the baking sheet. Instead, just put the French bread pan right on the oven rack.
Browning
I tested everything I could think of to get the perfect brown on the French Bread and what I found gave the best color came from brushing the loaves with melted butter just before baking. The good news is that they also came out beautifully browned with a brushing of melted Earth Balance as well – keeping the bread totally dairy free if need be.
Humidity
To get that crunchy crust and tender inside so characteristic of good French Bread it should bake in a humid environment. This is easily created by putting a pan of hot water into the oven while it preheats and just leaving it there while the bread is baking. You can also spritz the oven occasionally with water from a spray bottle but then you have to remember to do it whereas the pan of water just sits there and does its job.
Here’s how the whole thing goes:
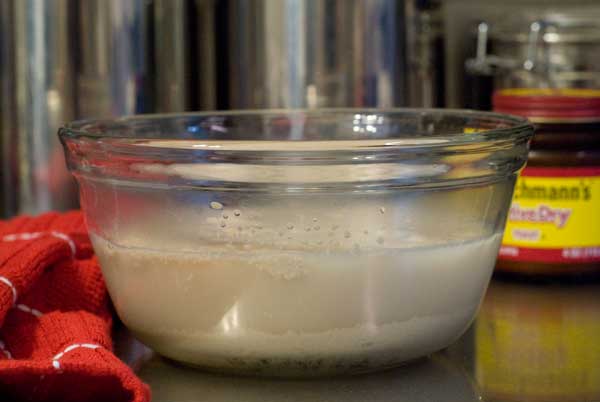
Mix the yeast, sugar and warm water – whisk to dissolve.
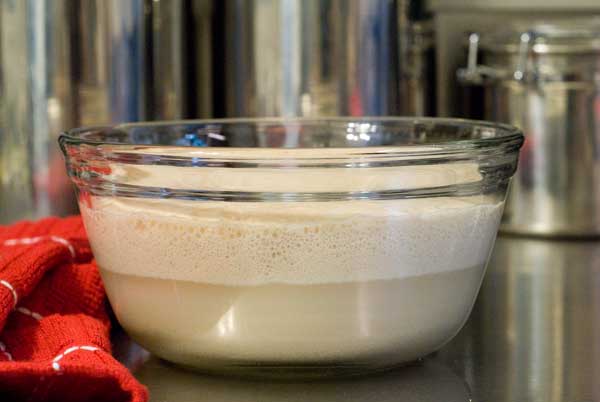
Let the yeast “proof” until foamy and doubled in volume.
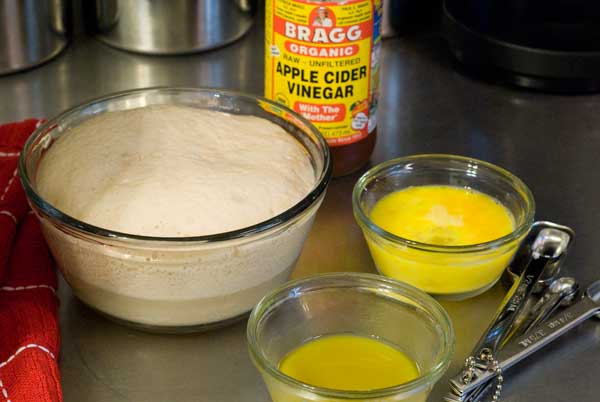
Get all your ingredients ready before mixing.
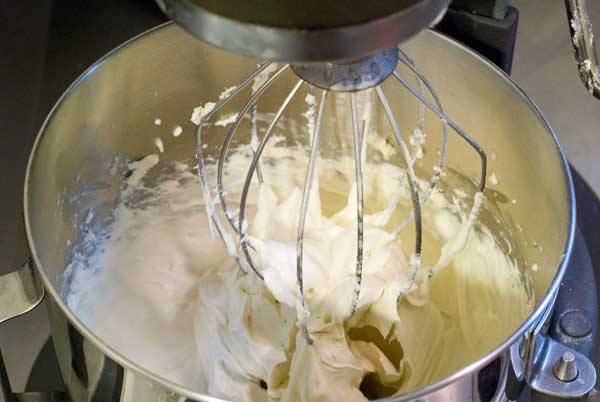
The dough will look more like batter than dough.
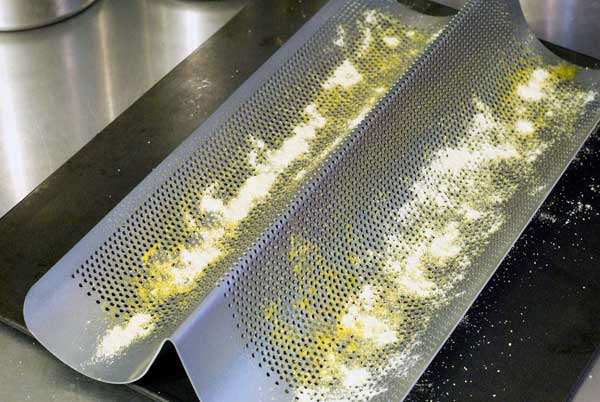
Grease the pan with oil and sprinkle with some cornmeal.
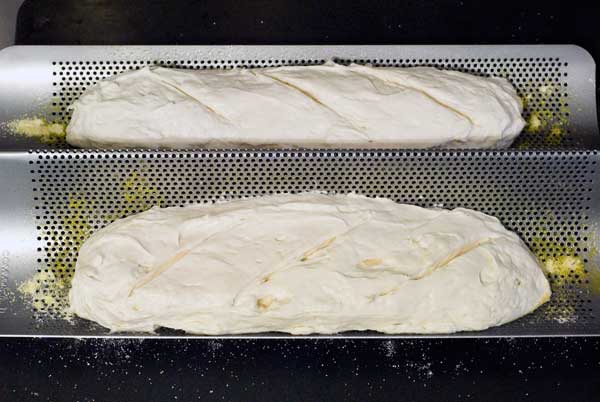
Spoon batter into pans, shape into ovals and slash the top 3 or 4 times.
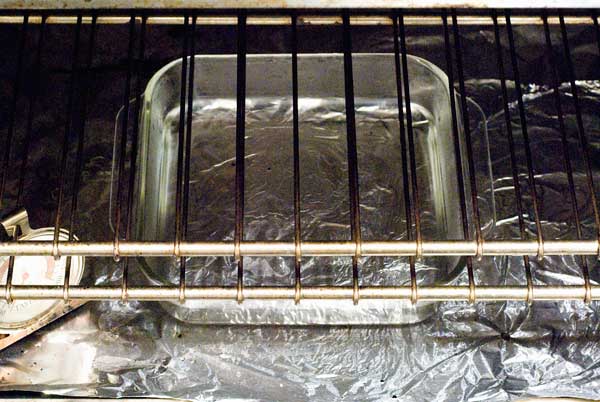
Place a pan of hot water into the bottom of oven.

Gluten Free Easy, Easy, Easy! French Bread Recipe
Ingredients
- 2 tablespoons Dry Active Yeast
- 2 teaspoons sugar
- 1½ cups warm water, it should be pretty warm to the touch but not hot
- 3 teaspoons xanthan gum
- 2 tablespoons olive oil
- 1½ cups super fine or Asian white rice flour*
- ½ cup superfine or Asian sweet rice flour*
- 1 cup tapioca starch*
- 1½ teaspoons kosher or fine sea salt
- 2 large eggs, lightly beaten
- 1 teaspoon apple cider vinegar
- 2 teaspoons cornmeal, optional
- 2 tablespoons butter or Earth Balance, melted
Instructions
- Combine the yeast, sugar and warm water in a bowl about twice the size of the mixture and whisk to dissolve the sugar. Let sit for 5-6 minutes (10 if the yeast has been in the fridge) or until it is foamy and doubled in size.
- In a small bowl stir the xanthan gum with the olive oil until the xanthan gum is dissolved.
- Combine the flours, tapioca starch (or gluten free flour blend) and salt in the bowl of a mixer fitted with a whisk attachment (or just the regular beaters – don’t use a dough hook) and mix to combine. Add the yeast mixture, xanthan gum mixture, eggs and vinegar and mix on low to combine. Scrape down the sides of the bowl once. Turn the mixer to high and mix for 3 minutes.
- Spray a French bread pan (with 2 forms) with gluten-free, non-stick cooking spray or brush with more olive oil and sprinkle a teaspoon of cornmeal onto the bottom of each pan.
- Spoon the batter into the forms and shape into an oval with a spatula. Using a razor blade or sharp knife cut 3 or 4 diagonal slashes on top of each loaf. Cover the loaves with a clean kitchen towel and set in a warm, draft-free place to rise. Let rise for 30 minutes or until the loaves have doubled in size.
- Place a baking pan on the floor of your oven (or on the bottom shelf) and fill it with about an inch of really hot water. Position the rack you are baking the bread on in the middle of the oven. Turn the oven on and preheat to 400 degrees.
- Brush the top of the loaves with the melted butter or Earth Balance and bake for 40-45 minutes or until the loaves are golden brown and sound hollow when tapped. Let cool in the pan for 5 minutes then remove to a wire rack to finish cooling.
- You can also make crusty rolls by scooping the dough into 2 standard sized muffin tins, letting them rise 30 minutes and baking for about 20 minutes.
Notes
Nutrition
Nutrition information is automatically calculated, so should only be used as an approximation.
Shop This Post


Thank you so very much for making your recipe public! My eldest son was diagnosed last month with celiacs so I’ve been searching for bread recipes so he will be able to eat turkey/dressing this Christmas.
Made this yesterday as he is coming in tonight for the holidays….am currently rising another batch as yesterdays disappeared :) VERY TASTY! NOM NOM :)
It is my pleasure and I am so happy you liked it! Happy Holidays!
I made this recipe for Christmas dinner yesterday. I used my bread maker and the bread came out great! I made a few changes, I used my Go Nuts bread flour and instead of apple cider vinegar(I was out) I used champagne vinegar. This bread came out great, I cut the loaf into cubes so I could make stuffing. It was amazing that my husband who can eat wheat asked me to make another loaf for dinner tonight!!!!!
Hi Alina, glad to hear it worked great in the breadmaker! People often ask me and I didn’t know the answer. The champagne vinegar sounds like a lovely addition!
I just followed my bread machines directions and then baked it on the gluten free setting. It took 3 hours to bake but it was worth the three hours.
That’s great to know! Thank you.
I tried your recipe yesterday and it is delicious. However, the bread did not fully cook on the inside. I have checked the temp in my oven and it is correct. I did forget to put the water in the oven, could that have made so much difference? I am going to try the recipe again but make rolls and see if they bake through better. If you have any tips for me to try I would appreciate hearing from you.
Thank you for making gluten free enjoyable.
The water really does make a difference, I tried baking the bread with and without the water and it always comes out better with the water. One thing is that you have to make deep slashes in the bread so the internal steam escapes. Make them like an inch deep. Thats the first thing I can think. Humidity can effect baking as well but I live in a very humid place. Sometimes I just have to bake the bread a little longer though because it is extra humid. The trick is to tap it and keep baking until the bread sounds hollow. I hope this helps!
This is by far my favorite bread recipe on this website, but Carol, please give us a sandwich bread recipe! Your blog is the best source of recipes I’ve found on the internet thus far. I’ve been a diagnosed Celiac for almost four years now, and I really enjoy experimenting with baking. As I continue my perilous search for a quality sandwich bread recipe, I continue to sigh at loaves of sub-par bread. I know that if you blessed us with a simple sandwich bread recipe, it would be a touchdown. Please, please, please! I miss sandwiches…
Hi Pauli – ok! I am going to get to work on it. But just as a note, I have made this bread, baked it in a loaf pan and it works great sliced for sandwiches. I am a Californian though so was very used to using sourdough as sandwich bread. This isn’t saou dough but it has a similar consistancy. You just need to bake a little longer. But I will get on the sandwich bread recipe soon!
Thank you so much for your great detailed explanation of the process. Just starting out in the gluten free world and am making or should I say trying to make seed rolls..I had the read the recipe numerous times thinking I had misread it because the dough looked so gooey.
Hi Ani – yes gluten free baking is different and people who are used to baking non-gluten-free often think they are doing something wrong when the dough looks more like batter. It is my pleasure, enjoy!
I don’t have that french bread pan……………any suggestions on how I can bake mine??
You can bake it in a loaf pan – it will just take a bit longer to bake, start with 10 minutes more and check it, you need that inside really baked through so make sure it sounds hollow when tapped and make deep slits in the top to release the steam. Enjoy!
I have been making gf breads homemade for quite a while now, and i find the paddle attachment works better than the wisk, so just a thought and worth a try….and this is by far one of THE BEST recipes we have had the privilege of making and EATING!!
Thank you. I did try this with the paddle attachment and personally preferred the whisk in this particular recipe but unless you are comparring side by side as I was, probably there is no difference. But if the paddle works better for you, then use that! Thanks so much for your very kind words!!!
I’ve been searching for a crusty bread I can use for bruchetta or meatball subs! I’m wondering what you’d recommend for someone who doesn’t use rice flour at home? I’m pregnant and trying to cut exposure wherever I can. I make a pizza dough with sorghum and millet flours and a bit of tapioca and/or potato starch, I also have buckwheat flour handy. Any ratio recommendations? I’d realllllly appreciate it! (Ordering the pan right now)
Hi Lauren. I am hesitant to say anything regarding a recipe I have not personally tried but if I had to take a guess as to how to adapt to rice free here is what I would do – I would substitute the white rice flour with sorghum for a total of 1 1/2 cups and the sweet rice flour with more tapioca starch for a total of 1 1/2 cups. Sorghum is denser than rice so it may be weter inside, make really deep cuts and check, you may have to bake longer.
I am really curious to know how this turns out, check back and let me know, will you? Good luck and I hope this works!
And congrats on the baby on the way! What a blessing and how good of you to be such a great mom right from the start!
Hi, I was wondering if you still need to use zanthum gum if the gluten free flour blend already has it in it.
Yes Pat you do. Because the yeast adds rise you need the extra support that the xanthan gum provides.
Carol, This bread just did not rise. How did you get yours to rise in 30 minutes? Katie
Make sure the yeast is good and you place in a draft free spot in the kitchen.