
Gluten Free Easy, Easy, Easy! French Bread Recipe
Updated Oct 17, 2025, Published Nov 11, 2011
This post contains affiliate links. Please see our disclosure policy.
Today is supposed to be a very lucky day – 11/11/11. And personally, I am inclined to believe it. It was lucky for me and I think lucky for you. I had a gluten free bread baking recipe breakthrough.
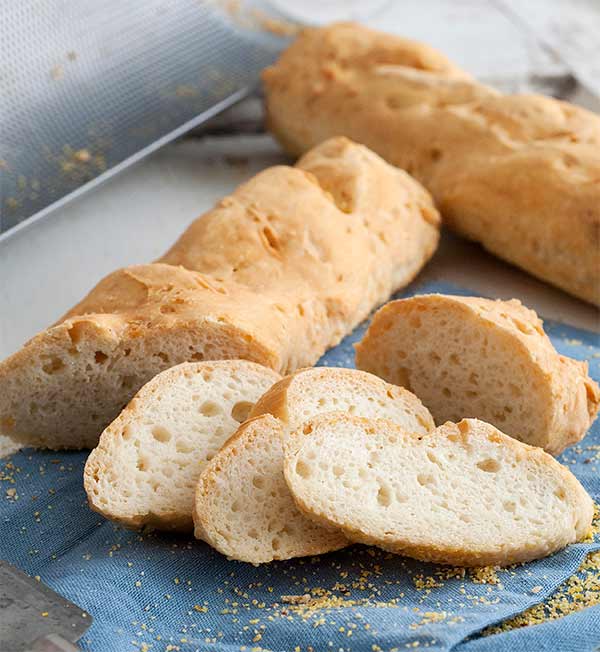
Table of Contents
As a person who spends most of her time creating gluten free recipes you can imagine that I get my fair share of emails asking if I have a really good recipe for gluten free bread. Before going gluten free I made a few loaves of bread (with varying degrees of success) but I was by no means a bread baker. When I get these emails I think “Why ask me? Why not ask a bread baking expert?”
But the more I thought about it, the more I realized, I am probably the perfect person to ask. Why? Because:
1. I went for probably 15 years without eating bread so I know I can live without it – I would rather not eat bread than eat yucky, grainy, crumbly bread.
2. I love great food but I am also kind of lazy so I am always looking for the easiest way to make something.
3. I am not a person who finds it “relaxing” to knead dough by hand for 15 minutes. I wish I was that kind of person, but sadly when I do menial tasks for any period of time, my mind starts to wander and that is never a good thing!
4. I am success driven, persistent and some might even say a little OCD – I will keep at something until I get it right.
So, I decided to put my mind to making great gluten free breads. I decided to start with gluten free French Bread. I did my homework, I studied first the traditional French Bread recipes and methods, then I looked at gluten free ingredients and studied how to make them work better and finally, I baked and baked and baked!
I played around with flours and baking times and methods until I got a gluten free French Bread recipe that was crunchy on the outside, tender on the inside, beautifully browned, tastes like what French Bread should taste like and was easy to make. I threw away a lot of bread, enlisted everyone I came across (including a good number of whom are regular gluten-eaters) in blind taste testing and finally, I am pleased to say, came up with a recipe I am happy with! And I think YOU will love!
And you want to hear the very best thing? It is actually EASIER to make gluten free French Bread than it is to make the gluten-filled kind! Yes, you heard right – EASIER! No kneading, no double rising (I tried, better without) no hours until bread is ready. You can actually have lovely, perfect gluten free French Bread in about an hour and a half, start to finish!
Ok… so here are some tips I discovered:
Equipment
You are going to need a mixer – it is going to do pretty much all the work for you. You also need a French bread pan – gluten free bread needs support when it is rising and baking. Fortunately, you can get one for under $20.00 – considering the cost of decent gluten free bread, an investment so worth it! The pans come either perforated or solid, I used both in testing and it didn’t make a huge difference but I did like the results from the perforated pans slightly more. And finally, unless you are dead certain your oven is totally accurate, run over to the hardware or grocery store and grab an oven thermometer for about 4 bucks – you should have one anyway!
Kneading
Remember when the internet was all abuzz about no-knead bread? Ha! That’s old news to us gluten free bakers! 3 minutes in the mixer and that’s pretty much it, no kneading what-so-ever!
Yeast
I got the best result from Dry Active Yeast. It needs to be “active” so if you have had a jar sitting in your fridge since you can’t remember when, go get a new one – it lasts about 6 months refrigerated, after that it may not be good any longer. If you do store your yeast in the fridge then it will take longer for the yeast to “proof.” You want the yeast mixture to pretty much double in size and be all foamy.
Flours
After testing all sorts of different flour combinations, what worked best was a simple combo of white rice flour, sweet rice flour (also called glutinous flour) and tapioca starch. I used all Asian flours (Erawan Brand) which are more finely milled and cost a fraction of the flours you get in the health food store. I also tested this recipe using my own flour and it came out really great (well…dahaaa!) and the dough was a tad easier to work with.
Gum and Fat
I found that mixing the xanthan gum with the fat (olive oil) before adding it to the batter made it work better. I wish I could tell you why, just trust me on this.
Prep
Get all your ingredients out, mix your yeast, blend the xanthan gum with the oil and lightly beat your eggs before you start to mix, it makes it easier. Do the steps in order as I give you in the recipe.
The Dough
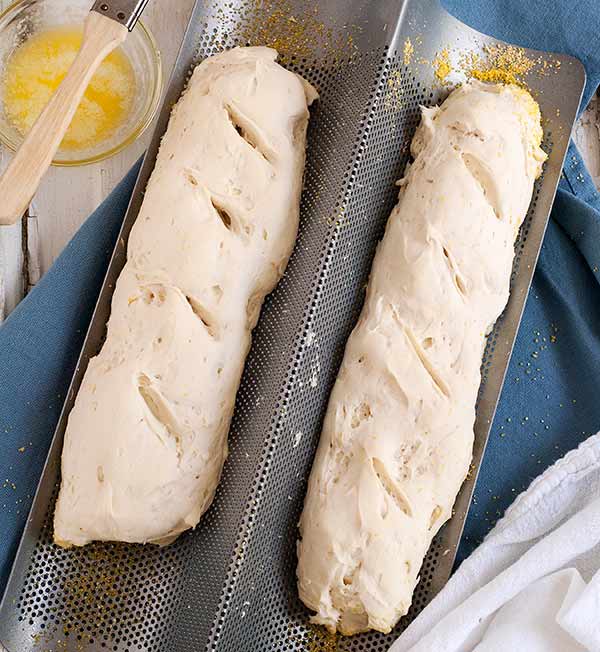
If you were used to bread making in a former pre-gluten-free life you will think there is not enough flour in the dough because it has a consistency more like a thick batter than dough. Resist with every fiber of your being from adding more flour! This is just the way gluten free bread dough is. You need to spoon the dough into the pans and shape it with a spatula – it won’t magically turn into pretty ovals unless you do this.
Slashing the Dough
Cutting 3 or 4 diagonal slashes into the top of the dough will help the steam escape while it is baking giving you a lovely, tender texture.
Prepping the Pans
Either spray your French Bread pans with gluten-free, non-stick cooking spray or brush with oil before putting the dough into the pans to rise. For a really authentic bottom, sprinkle a teaspoon of cornmeal on the bottom of the pans after you oil them up. It isn’t completely necessary but it does add that certain je ne se qua (fancy French term for “a certain something”). If using the perforated pans, place them on top of a baking sheet to oil and dust with cornmeal or you will have a mess to clean. Do not bake the bread on the baking sheet however, just put the French bread pan right on the oven rack.
Browning
I tested everything I could think of to get the perfect brown on the French Bread and what I found gave the best color came from brushing the loaves with melted butter just before baking. The good news is that they also came out beautifully browned with a brushing of melted Earth Balance as well – keeping the bread totally dairy free if need be.
Humidity
To get that crunchy crust and tender inside so characteristic of good French Bread it should bake in a humid environment. This is easily created by putting a pan of hot water into the oven while it preheats and just leaving it there while the bread is baking. You can also spritz the oven occasionally with water from a spray bottle but then you have to remember to do it whereas the pan of water just sits there and does its job.
Here’s how the whole thing goes:
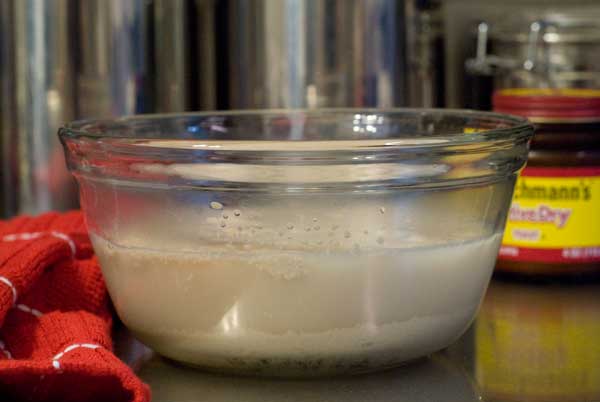
Mix the yeast, sugar and warm water – whisk to dissolve.
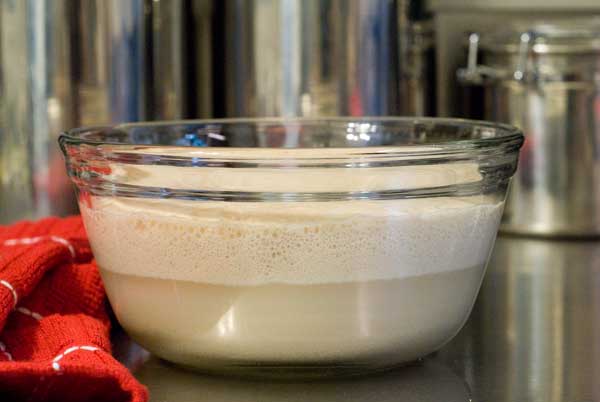
Let the yeast “proof” until foamy and doubled in volume.
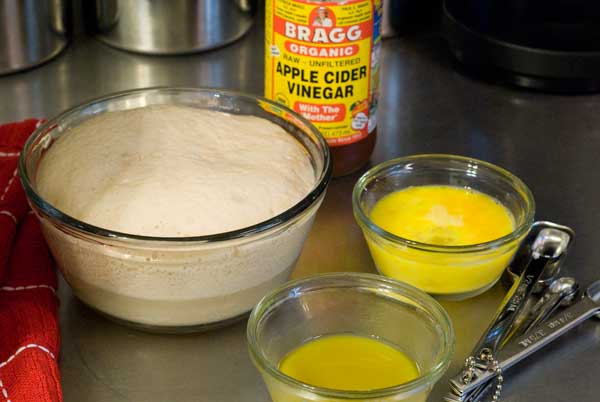
Get all your ingredients ready before mixing.
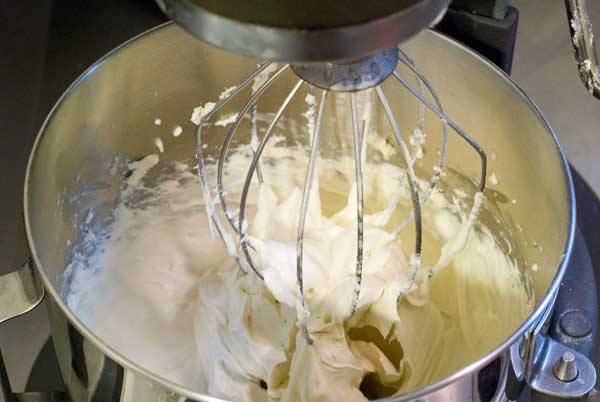
The dough will look more like batter than dough.
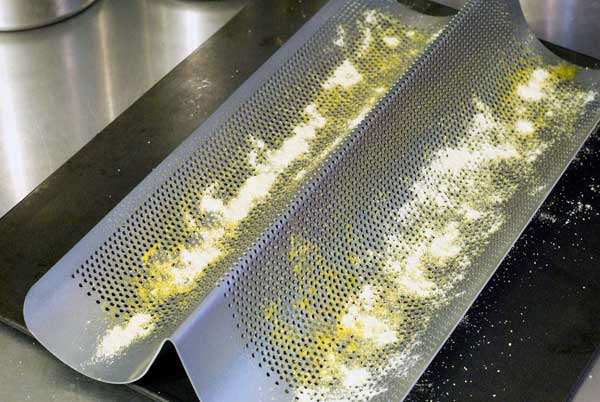
Grease the pan with oil and sprinkle with some cornmeal.
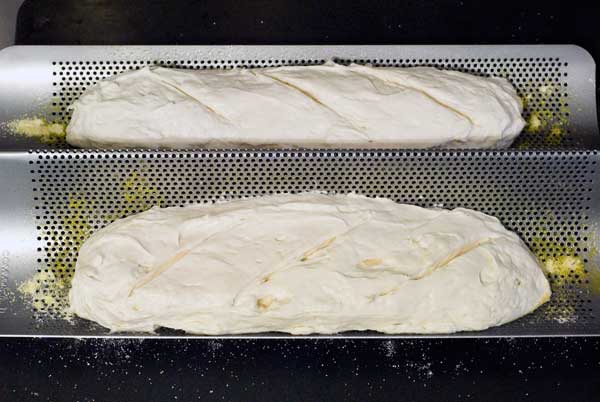
Spoon batter into pans, shape into ovals and slash the top 3 or 4 times.
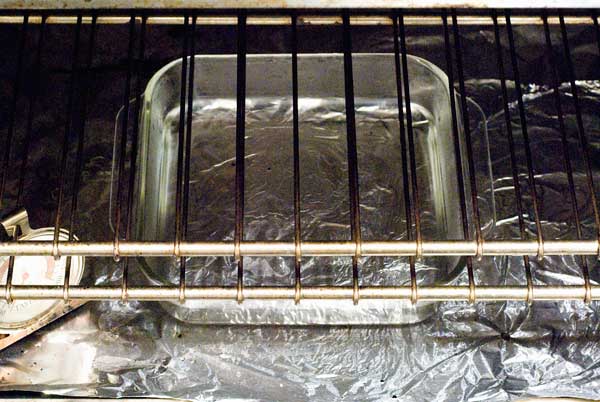
Place a pan of hot water into the bottom of oven.

Gluten Free Easy, Easy, Easy! French Bread Recipe
Ingredients
- 2 tablespoons Dry Active Yeast
- 2 teaspoons sugar
- 1½ cups warm water, it should be pretty warm to the touch but not hot
- 3 teaspoons xanthan gum
- 2 tablespoons olive oil
- 1½ cups super fine or Asian white rice flour*
- ½ cup superfine or Asian sweet rice flour*
- 1 cup tapioca starch*
- 1½ teaspoons kosher or fine sea salt
- 2 large eggs, lightly beaten
- 1 teaspoon apple cider vinegar
- 2 teaspoons cornmeal, optional
- 2 tablespoons butter or Earth Balance, melted
Instructions
- Combine the yeast, sugar and warm water in a bowl about twice the size of the mixture and whisk to dissolve the sugar. Let sit for 5-6 minutes (10 if the yeast has been in the fridge) or until it is foamy and doubled in size.
- In a small bowl stir the xanthan gum with the olive oil until the xanthan gum is dissolved.
- Combine the flours, tapioca starch (or gluten free flour blend) and salt in the bowl of a mixer fitted with a whisk attachment (or just the regular beaters – don’t use a dough hook) and mix to combine. Add the yeast mixture, xanthan gum mixture, eggs and vinegar and mix on low to combine. Scrape down the sides of the bowl once. Turn the mixer to high and mix for 3 minutes.
- Spray a French bread pan (with 2 forms) with gluten-free, non-stick cooking spray or brush with more olive oil and sprinkle a teaspoon of cornmeal onto the bottom of each pan.
- Spoon the batter into the forms and shape into an oval with a spatula. Using a razor blade or sharp knife cut 3 or 4 diagonal slashes on top of each loaf. Cover the loaves with a clean kitchen towel and set in a warm, draft-free place to rise. Let rise for 30 minutes or until the loaves have doubled in size.
- Place a baking pan on the floor of your oven (or on the bottom shelf) and fill it with about an inch of really hot water. Position the rack you are baking the bread on in the middle of the oven. Turn the oven on and preheat to 400 degrees.
- Brush the top of the loaves with the melted butter or Earth Balance and bake for 40-45 minutes or until the loaves are golden brown and sound hollow when tapped. Let cool in the pan for 5 minutes then remove to a wire rack to finish cooling.
- You can also make crusty rolls by scooping the dough into 2 standard sized muffin tins, letting them rise 30 minutes and baking for about 20 minutes.
Notes
Nutrition
Nutrition information is automatically calculated, so should only be used as an approximation.
Shop This Post


I had to make this bread twice to figure out what was going on.
I have been making Julia Child’s French bread for many years. I have added her baking technique to this recipe.
With her technique you only need 1 tbs yeast (Maybe a single packet [2 1/4 tsp] would be enough).You can also taste the salt, so I reduced it from 1 1/2 tsp of sea salt to 1 1/4tsp. That would be a scant tsp of regular salt. You want to taste the bread, not salt.
The Julia Child technique is to supply a burst of steam and then after a few minutes get the water out of the oven. She adds boiling water to the pan in the oven. The oven is preheated to 450°F. After she puts in the bread, she puts a hot brick or equivalent in the pan of boiling water, which produces violent steam. After about eight minutes the water is removed entirely, the oven temperature is reduced to 350° or 400° F, whichever you prefer, and the bread then bakes normally.
I use a 5 lb weight-lifter’s plate instead of a brick. I heat it on a burner until it is really hot, and at the right time, insert it in the oven with tongs, protecting my hands and arms from possible splashing water. You remove the water when the bread shows the slightest coloration. It will NOT have fully risen at this point.
You do not need to butter the crust. It serves no purpose. the Julia Child method gives you a dark crust that is crisp and a beautifully expanded crumb (interior).
La coupe (the slashes) should be done just before putting in the oven, not before rising. It may make only a small difference with this cake-batter like mixture, but it is noticeable.
When you have a perfectly looking, perfectly chewing baguette, it nevertheless tastes of rice. At least the excess yeast concealed the rice taste. I use this rice mix because my system cannot deal with soy, sorghum, millet, or teff. It reminds me of that championship golf course in Hell. They have no golf balls available. : )
PS
Don’t burn youself when fooling with the hot brick/metal/ whatever. I wear a leather gardener’s glove.
PPS
I am going to try it without the eggs, which I presume are there for their protein, not their flavor. French bread consists of flour, yeast, water, and salt.
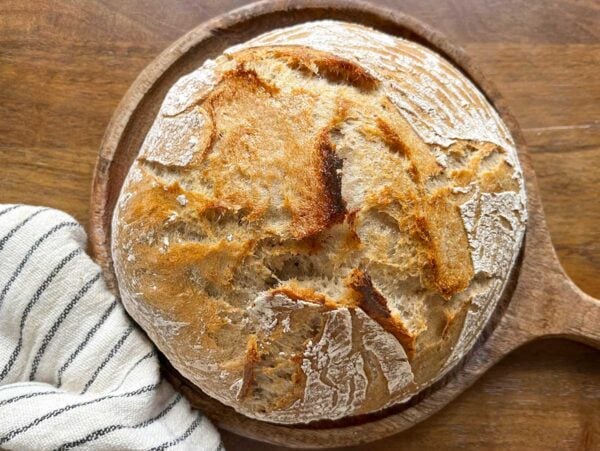
Attached is my wife’s photo of the second loaf, which I am going to cut into for dinner tonight.
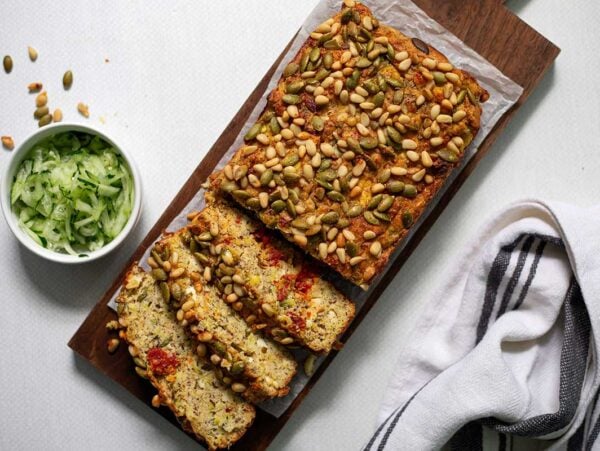
And here is a picture my wife took during dinner this evening showing a slice of the bread and the beautiful crumb.
Just got done making my first batch from this recipe. VERY GOOD ! Next I’m gonna try to make a sandwich bread loaf using this same recipe. Thank You :)
Thank YOU Carol, so happy you enjoyed it!
no matter how many times i tried, my dough came out like crumble. i have no idea where you get a scoopable dough from. Is it because i used the robin hood gluten free flour blend?
Hi Mel,
First of all you can get the dough forms at kitchen shops or on Amazon. Secondly I am not familiar with that flour. I have made this recipe hundreds of times and it always comes out perfect so I am guessing the flour may be the reason.
I had the exact same problem as Mel. I followed the recipe but it was crumbly and not anywhere near batter consistency. The Robin Hood Gluten free flour is made of Rice Flour, Sugar Beet Fibre, Potato Starch and Tapioca Starch. Any suggestions?
Anne,
I’m not familiar with that flour but I’m guessing the sugar beet flour dries it out. I would suggest using a good quality cup-for-cup replacement flour and follow the recipe as directed.
xo,
Carol
I just found your recipe and was going to try it in the morning, but don’t have “French bread pans” do you have any suggestions to try without??
Hi Lisa,
You can use a 9×5 loaf pan, just cook it a little longer. I don’t remember how much longer though, I think about 10 or so minutes just check it. If you do, make the slits a little deeper so its not gummy on the inside.
xo,
Carol
I used Pamela’s Artisanal blend, and added maybe 1/4 tsp xanthan (the blend already contains guar). Let them rise in the oven, covered loosely, then baked at 400 for 40 mins. I also didn’t have the dough forms, so I put them in regular loaf pans, on parchment paper. They came out beautifully, and they are delicious. I forgot to butter them before baking so I did it after they came out of the oven, and they lost their crustiness–fine by me. A crusty loaf would be nice, but soft is great too! They’ll crisp up in the toaster, I’m sure. I’m so happy with how they turned out. This is a fantastic recipe! Thanks!!
Amy,
You are a crafty one! I’m so happy you enjoyed them!
xo,
Carol
I tried this bread, and what can I say?
It is the only ever gluten-free bread I made that was not just edible, but absolutely great.
None of the people eating it realized it was gluten-free until I mentioned it.
I used the ATK gluten-free flour blend, however.
Carol, thank you for this lovely recipe. I’m still tweaking it, but I’ve made it three times so far, and it’s been so helpful for the kids lunches. This last time, I swapped out 1/2 cup brown rice flour instead of all white rice flour and used gelatin instead of xanthan gum (twice as much gelatin as xanthan). It changed the mixer from doughy, to more pancakey batter, but the taste and consistency was better. Any tips for swapping out the xanthan gum?
Hi Julie,
Love that you’re making this your own. Well a few good subs are sweet rice flour, arrowroot and cornstarch, you can find others online.
Pick what suits you best and I’d say try it out!
xo,
Carol
I was about to give up on making my own gluten/grain free bread, but I saw your receipe and decided to give it another shot. I am so glad I did. Not only was the receipe easy as stated, however this bread is so delicicious, I would put it up against any gluten or grain laden product out there. Since we are also grain free I substituted 1 cup of moong bean flour and 2 cups of tapioca flour for my flour mixture and it was incredible! Thank you for giving me my bread back!
You’re welcome Amber! I’m so happy to hear how well this worked for you! :)
xo,
Carol
Tried your recipe. Turned out beautiful however only realized after eating it & reviewing the recipe that I actually only put in 2tsp of yeast instead of 2TBS. So I tried it again the next day & it flopped. Is 2TBS too much yeast?
Hmm, I don’t know what to say to that Lea. I always use 2 tbs of yeast if you can get away with tsp, great!
xo,
Carol