Kawaii Eyes: The Perfect Summer Look
Updated Jun 25, 2018, Published Nov 01, 2017
This post contains affiliate links. Please see our disclosure policy.
My sister is just about obsessed with Kawaii. Bright colors, bold graphics, characters with large eyes and tiny mouths, the works. She’s even begun squealing “Kawaii!” when she sees something adorable.
So what is Kawaii? It is simply Japanese for “cute.” What was a small island’s obsession with cute things has turned into a worldwide phenomenon, especially in the US among manga and anime fans (Japanese comics and cartoons in the same art style, respectively). You’ve actually seen Kawaii before: a very popular Japanese cartoon kitty embodies the Kawaii craze.
Though I’m not into the extreme sparkles, overload of pink, and falsetto voices that often go along with Kawaii, I’m beginning to fall in love with it anyway. Why? Because there is something endearing about a group of people all focused on finding cuteness. While so much of the world is focused on “cool” or “impressive” or “beautiful,” people who are into Kawaii just care about the cute.
This look comes to you courtesy of my Kawaii-obsessed sister. She envisioned the idea and played with the application. I simply tweaked her colors and wrote down the steps.
This look is inspired by the bright colors, large eyes, and simplistic graphics that are typical of Kawaii. It translates into a surprisingly wearable and youthful look that’s perfect for summer. I love it!
Get the Look:
 Base:
Base:
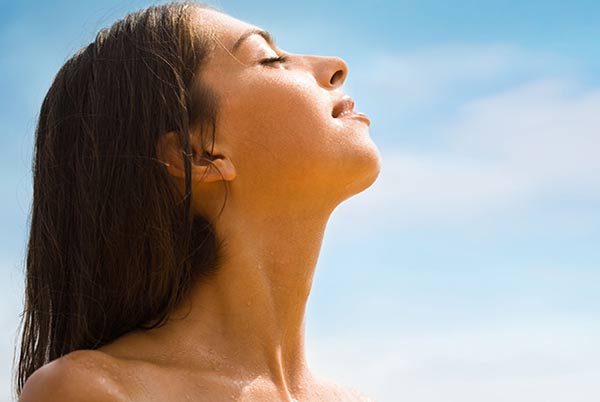
Start out by prepping your face with a foundation that matches your neck and not your face, preferably liquid. This type of color matching is something many makeup artists recommend doing anyway, because your neck is the less “influenced” skin and is truest to your natural color. The reason this is important for this look is because the palest skin you can get away with, the better. Kawaii girls tend to have pale, china doll-like, dewy skin.
Also fill in your brows. I did mine naturally, because I didn’t want to take this look over the top. It’s just my personal preference. However, Kawaii’s bold graphics encourage extremely groomed, perfectly arched, thin, and solidly colored brows. So if you really want to go all out, and if you like putting that much work into your brows, by all means do it! It’s true Kawaii!
1)
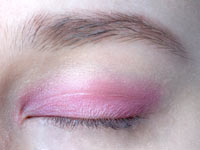
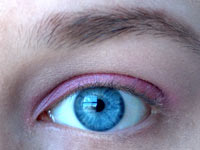
Pat bright pink shadow all over your lid. The particular shade doesn’t really matter, but this one I’m using is a lovely cool pink that builds to nearly electric shades, or stays relatively muted if you only apply it lightly. Because it blends so well, it works beautifully either way. Blend the pink with wind-shield wiper-like strokes up into your crease.
2)
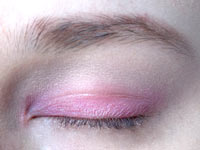
With a neutral, matte, pale skin-colored eye shadow, brush under your brow bone and into the inner corner of your eye. Blend the line between the pink and the neutral shade even further.
3)
Take a brown eye pencil and lightly line just the outer third of your lower lash line. Take a liner brush and blend. This step is almost invisible, but it recesses the corner of your eye to help add a rounder, more wide-eyed look.
4)
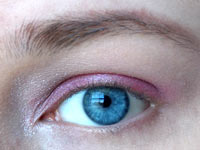
With a sparkly white shadow, dust the inner corners of your eyes. This does double duty as highlighting that “wide-eyed” look and incorporating the mandatory Kawaii sparkles!
5)
Now that you have the color, the wide eyes, and the sparkles, the last step is to add something graphically inspired: a tiny cat eye, which is more of a “flick” than anything else. Your perfect flick angle is pointing the end of the flick towards the end of your brow. To help you find that angle you can line up a pencil from the outer corner of your eye to the end of your brow. If you mess up, grab a Q-tip, dip it in makeup remover, wipe off the flick, and try again. Line your upper lash line from corner to corner with black liquid liner, making it a wee bit thicker on the outer corner than the inner. Take your little flick out only a half inch or less. It’s a good idea to go over your lash roots a second time to help fill in any gaps you may have missed, especially with liquid liner. So before you move on, double check your roots to ensure you solidly covered everything.
Finishing:
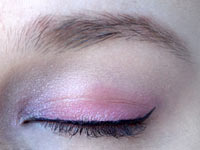
Brush mascara onto your lashes. Kawaii girls have serious lashes, so I recommend using two layers of mascara: one that lengthens and one that volumizes. This adds extra oomph to your lashes without falsies. Apply vibrant pink lip gloss to your lips. Dust pale pink blush onto the apples of your cheeks.
And you’re done!
Kawaii!
Products used:
Face:
Illuminare Extra Coverage + Fantastic Finish, Everyday Minerals Blush (Wild Flower Heaven), Honeybee Gardens Matte Eye Shadow (Kashmir)
Eyes:
Mirabella Eye Colour (Pretty Edgy), Everyday Minerals Matte Eyes (Rare Silk), Monave Versatile Mineral Powders (#61), Mirabella Eye Definer (Twig), Mirabella Magic Marker Eyeliner, NARS Larger Than Life Volumizing Mascara, Mirabella Lash Essential
Lips:
Mirabella Colour Luxe (Flicker)
Written by Afton Jones