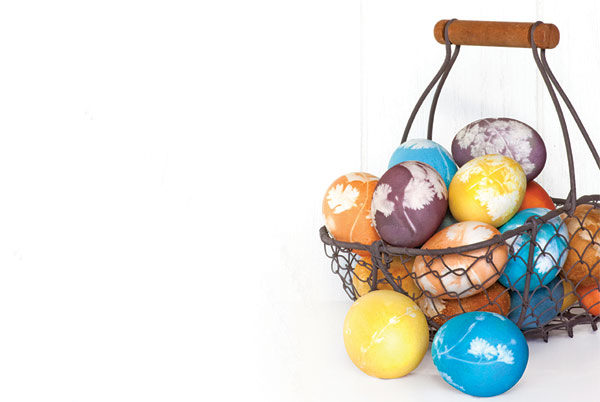
Easter Eggs: Flora Inspired & Naturally Dyed
For ingredients to make beautifully colored Easter eggs, look no further than your fridge and pantry. Press on a few sprigs of fresh herbs and not only have you created works of art – you’ve also wisely avoided a rainbow of synthetic colors found in those 99 cent Easter egg coloring kits.
Throughout history, plant pigments have been used to dye textiles. The same onion skins and cabbage leaves used to naturally tint cloth may also be used to create exquisite earth-toned Easter eggs. Though coloring eggs in plant-based dye may take a little longer, the wait is worth it!
Here we share our favorite natural dyes and our method for achieving six lovely colors without boiling a single pot of dye.

Ground turmeric: Yellow
Yellow onion skins: Orange
Red cabbage: Blue
Instant coffee: Brown
Beet root: Plum
Hibiscus tea: Purplish-black
Make six dye baths by combining the ingredients for each color in separate tall 12-ounce jars or drinking glasses. Cover and steep for 6 hours. Strain cabbage, onion skin, and beet root dyes.
|
|
 Brown: 2 tablespoons instant coffee + ¾ cup boiling water + 2 teaspoons vinegar Brown: 2 tablespoons instant coffee + ¾ cup boiling water + 2 teaspoons vinegar |
 Purplish-black: 2 bags hibiscus tea + ¾ cup boiling water + 2 teaspoons vinegar Purplish-black: 2 bags hibiscus tea + ¾ cup boiling water + 2 teaspoons vinegar |
 Plum: Loosely pack jar with shredded or diced beet root, then add 2 teaspoons vinegar and fill the rest of the way with boiling water. Plum: Loosely pack jar with shredded or diced beet root, then add 2 teaspoons vinegar and fill the rest of the way with boiling water. |
 Blue: Loosely pack jar with shredded red cabbage, then add 2 teaspoons vinegar and fill the rest of the way with boiling water. Blue: Loosely pack jar with shredded red cabbage, then add 2 teaspoons vinegar and fill the rest of the way with boiling water. |
 Orange: Loosely pack jar with yellow onion skins, then add 2 teaspoons vinegar and fill the rest of the way with boiling water Orange: Loosely pack jar with yellow onion skins, then add 2 teaspoons vinegar and fill the rest of the way with boiling water |
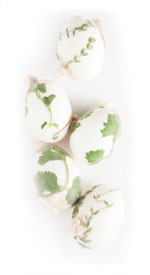 For flora textured eggs, gather sprigs of fresh herbs such as cilantro, parsley, and thyme. Cut the legs of a pair of sheer hosiery into 5-inch pieces. Tie a knot at one end of each piece of hosiery. While pressing a sprig or two of herbs around a hard boiled egg, slip the egg into the piece of hosiery. Pull hosiery snug and tie a knot at the other end to secure.
Immerse 2 hard boiled eggs in each dye bath and refrigerate for 12-24 hours or until desired colors are achieved. Snip off hosiery, remove herbs, and return eggs to a carton to dry completely.
The Perfect Hard Boiled Egg
(Keep in mind that eggs that are too fresh are difficult to peel. For best results, use eggs that are a week or two old.)
Fill a large stockpot with cold water. Carefully place 12 eggs along the bottom of the pot in a single layer. Do not overcrowd. Ensure eggs are covered with at least 1 inch of water. Bring to a boil. When the eggs begin to tap dance on the bottom of the pot, cover the pot and cook for 30 more seconds. Turn off the heat and set a timer for 14 minutes. After 14 minutes, use a slotted spoon to transfer the eggs to a bowl of ice water. Refrigerate hard boiled eggs until ready to use.
Written by Alexa Croft


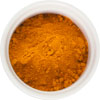 Yellow:

Pingback: BLT Deviled Egg Dip Recipe | Best Gluten Free Website
Pingback: Gluten Free Vegan Carrot Cake | Recipe | Simply Gluten Free
Pingback: Gluten Free Baked Scotch Eggs | Recipe | Simply Gluten Free
Pingback: Gluten Free Strawberry Rhubarb Nests Recipe | Simply Gluten Free
Pingback: Gluten Free BLT Deviled Egg Dip | Recipe | Simply Gluten Free
Pingback: Grilled Vegetable Salad | Gluten Free Recipes | Blog
Pingback: My Mom's Easter Ham | Recipe